

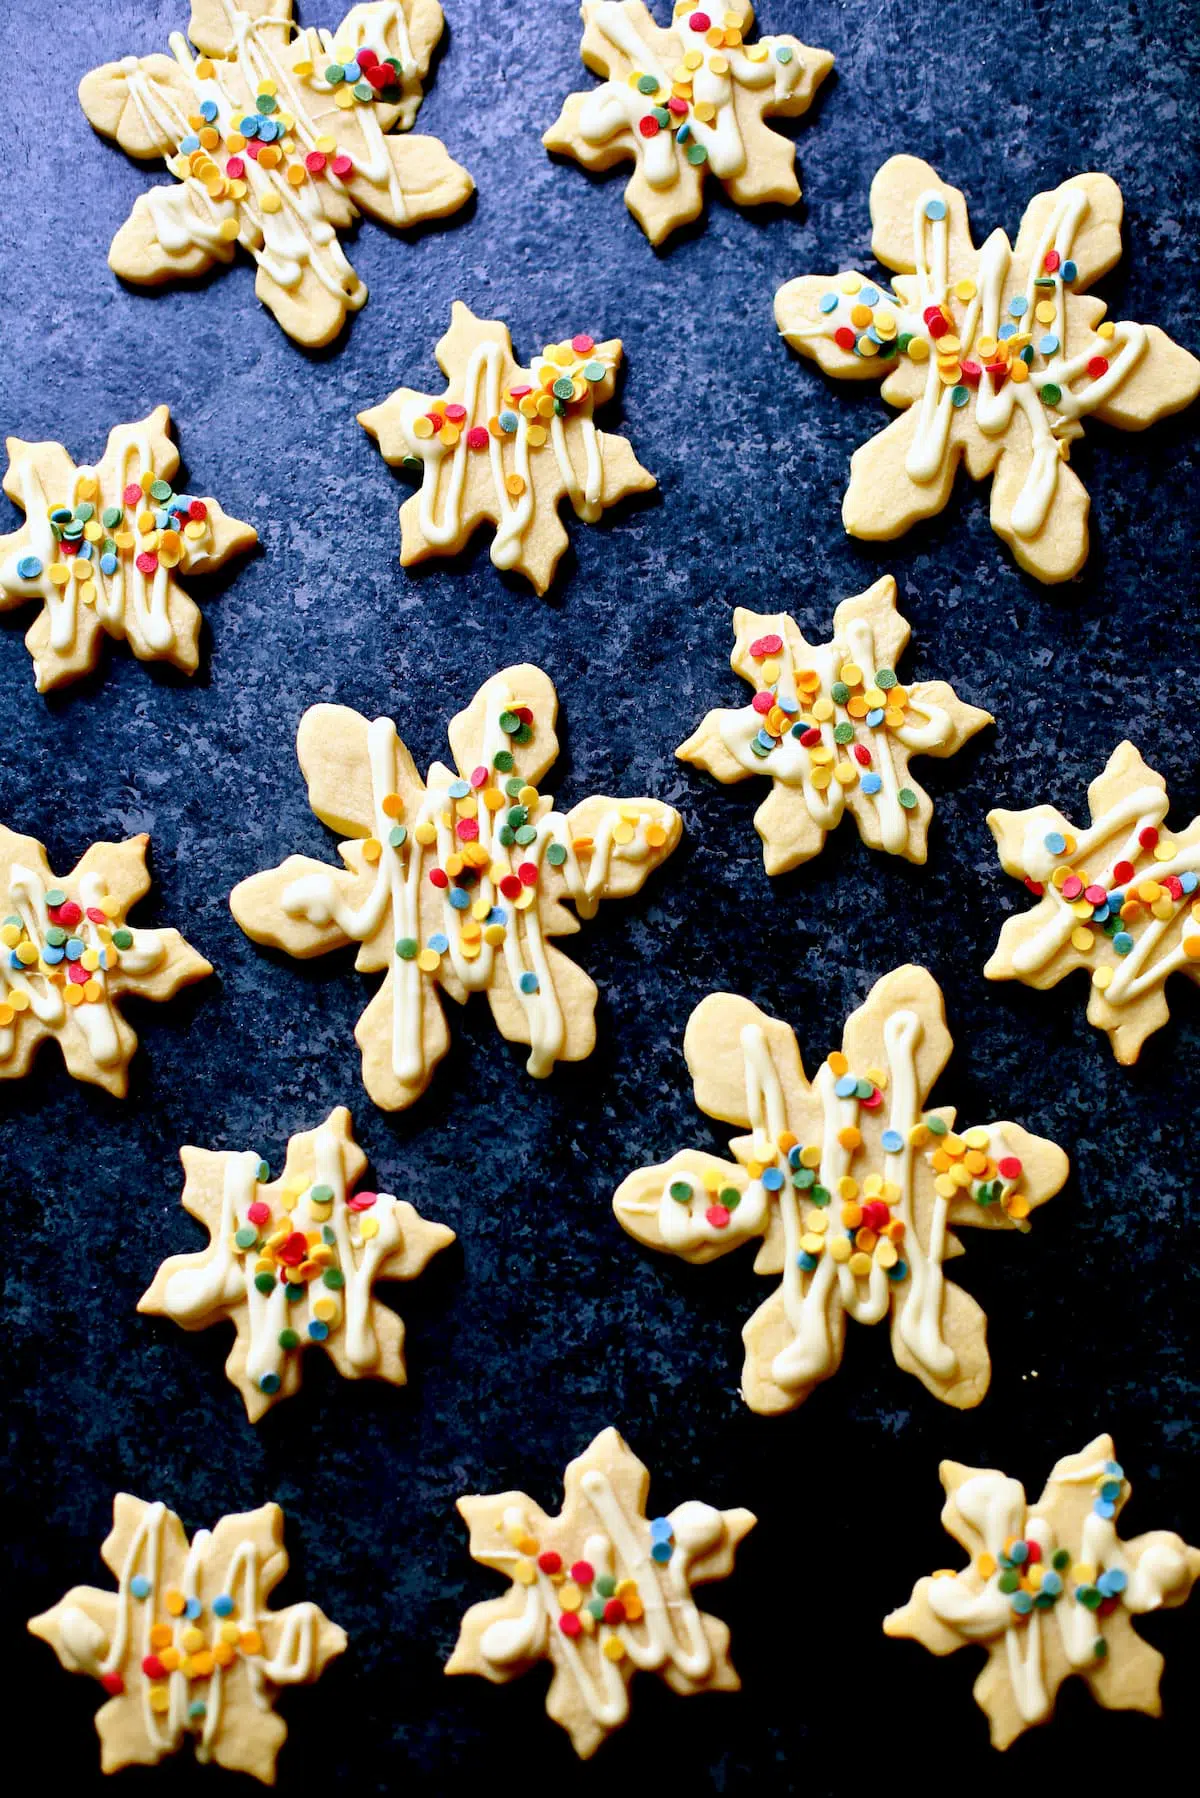
Everyone loves a decorated sugar cookie recipe, and these Chocolate Snowflake Cookies are full of flavor. There’s no cocoa powder in these – just a simple piping of white chocolate and some sprinkles for a festive touch!
Jump to:
Why You’ll Love This Recipe
A crumbly, vanilla-scented sugar cookie is one of the best things you can eat, ever. I mean, who wouldn’t want to eat giant white chocolate snowflakes?
If sugar cookies are drizzled with any kind of chocolate and sprinkles, I’m done. If you feel the need to have a frothy cup of Hot Chocolate with said cookies, well, who am I to argue?
Here’s why this sugar cookie recipe is so good:
- The dough on these snowflake cookies are thick, but still a little soft when you bit into them. This is an easy recipe and a festive dessert for lots of occasions. The snowflake shapes are super fun!
- These cookies have an outstanding vanilla and butter flavor.
- Even though these cookies are shaped like a snowflake, they’re plain enough to stand up to a sweet garnish of white chocolate. If you’re a fan of this idea, you’d probably like my White Chocolate Peanut Butter Cups.
- The snowflake shape is a festive suggestion (great for Christmas cookie gifting) but this is a classic sugar cookie recipe, and any cookie cutter shape will work well.
Love cookies? Try these brownie-like, bite-sized Triple Chocolate Cookies too.
Ingredients You’ll Need
For a full list of ingredients, please scroll down to the recipe card.
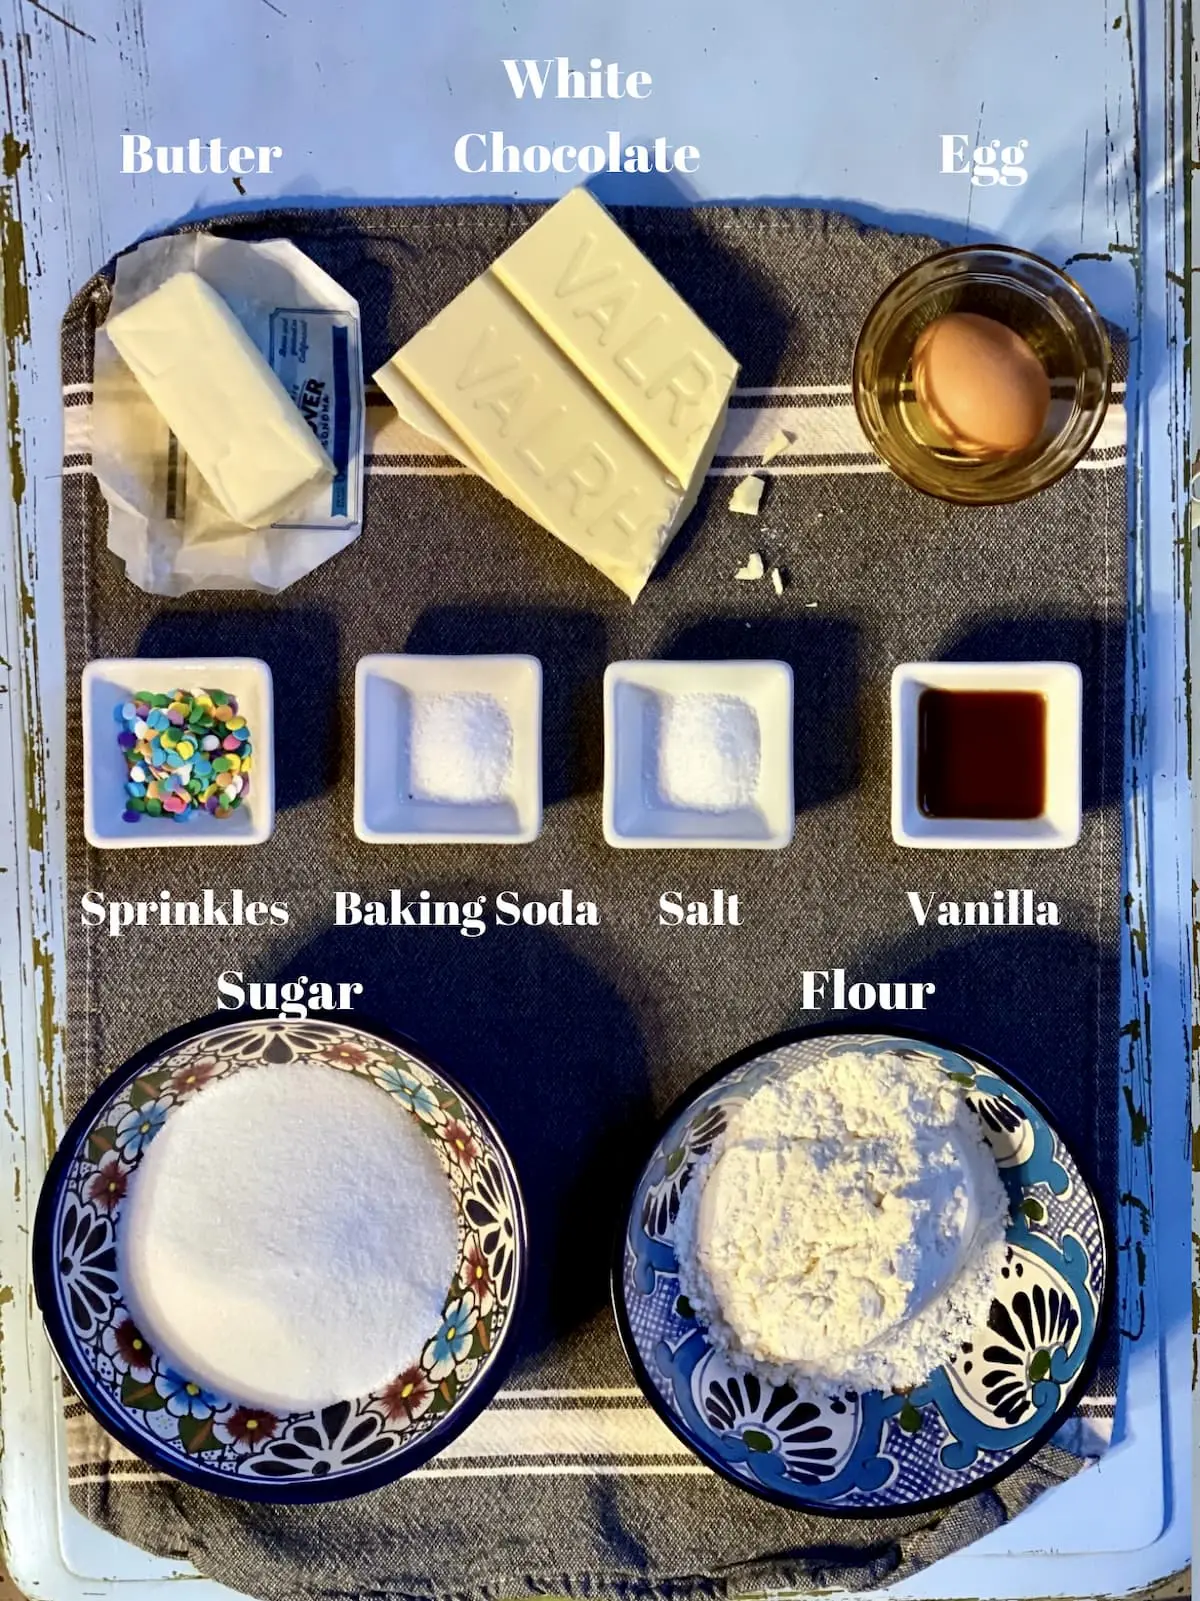
- Butter: Unsalted butter, softened to room temperature for 20-30 minutes on the counter.
- Sugar: Just the regular stuff, nothing special here.
- Flour: Just regular all purpose flour here.
- Egg: Large, also brought to room temperature (see butter, above).
- Pure Vanilla Extract: For a sweetness and depth we can’t get anywhere else.
- Baking Powder: It always pays to have a fresh box on hand. When it’s about it expire, I put it in the fridge as natural deodorizer.
- Salt: I like Diamond Crystal Kosher Salt for so many reasons, and I keep a big box on hand all the times.
- Chocolate: White chocolate, melted and drizzled, does the job here. No need for icing sugar!
Step-By-Step Instructions
For the full list of instructions for this recipe, please scroll to the recipe card below.
- Make the sugar cookie dough: This is a sugar cookie dough that’s easy to make and work with. Start with a large bowl and follow the instructions below to add the butter, sugar, eggs, vanilla, flour baking powder and salt. Dry ingredients first!
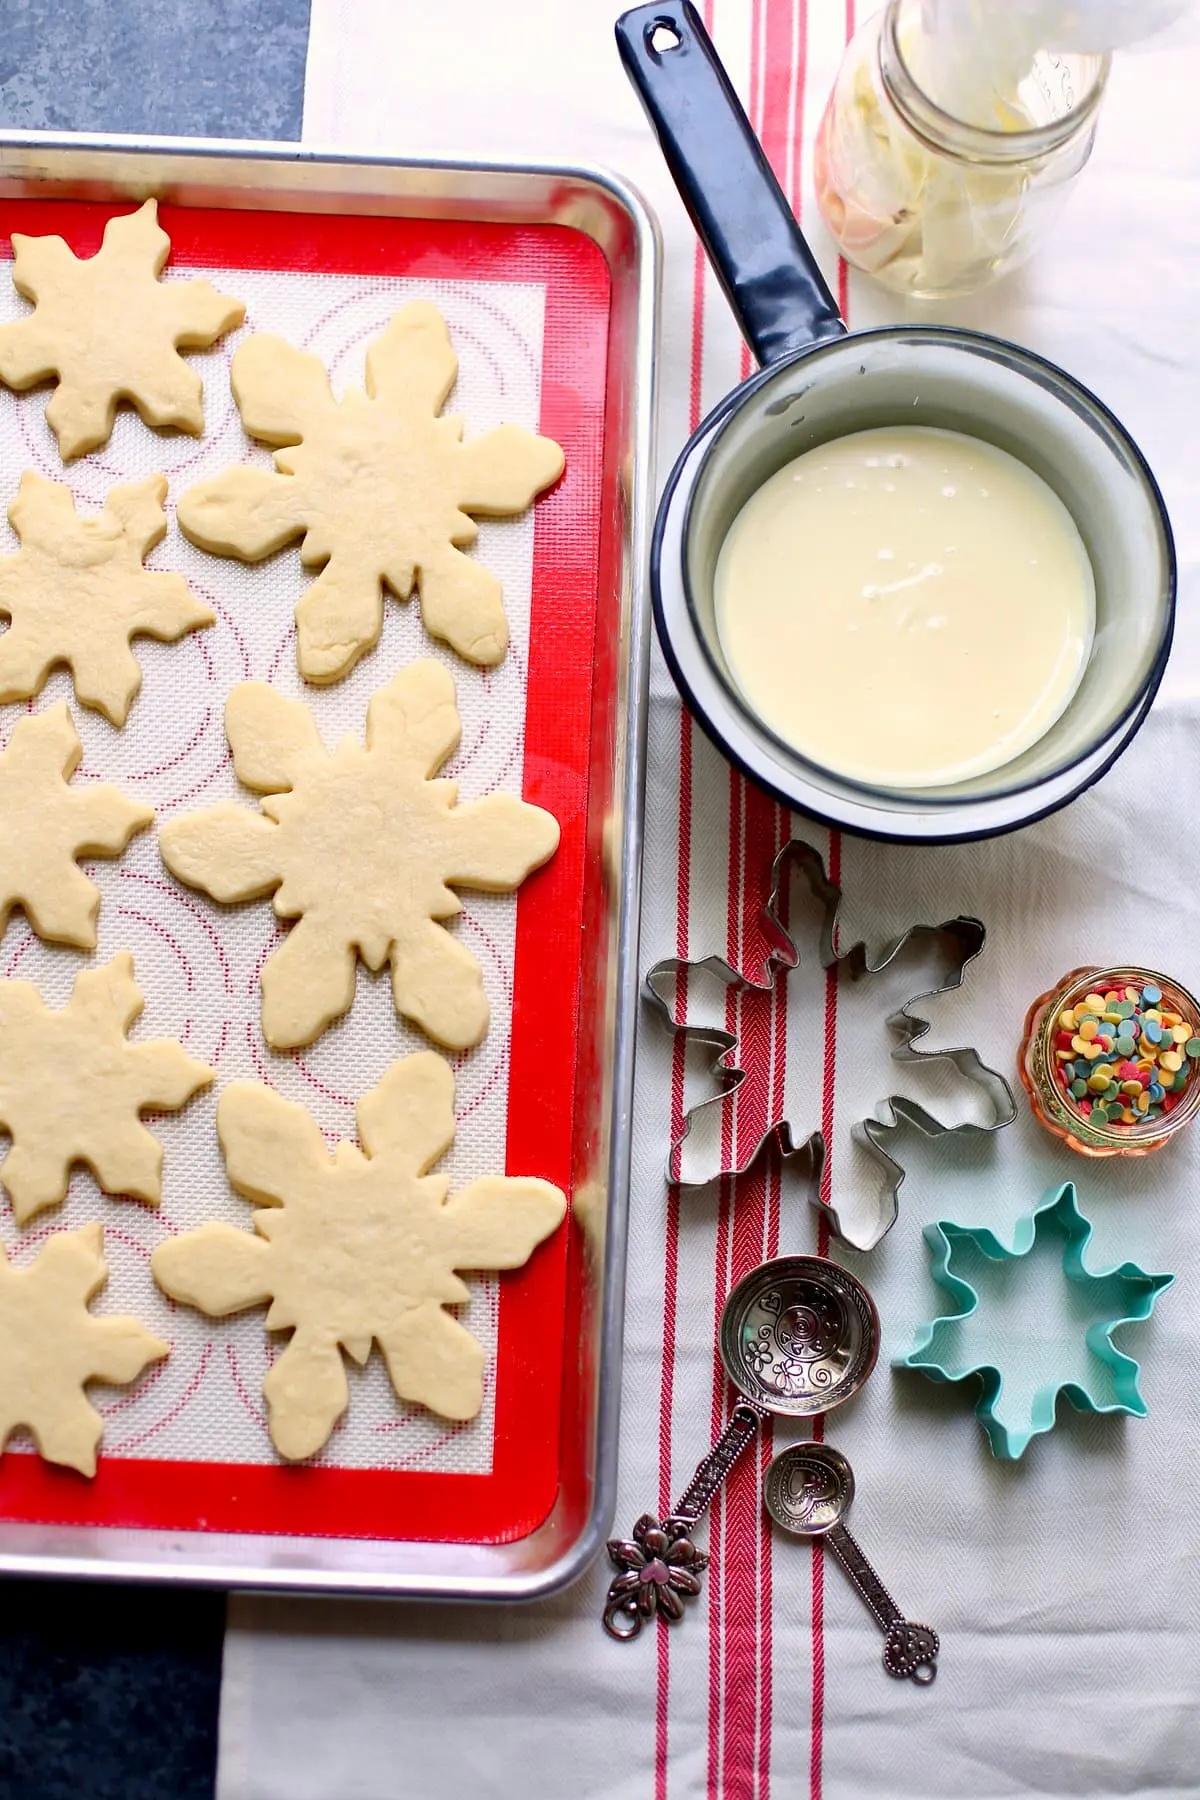
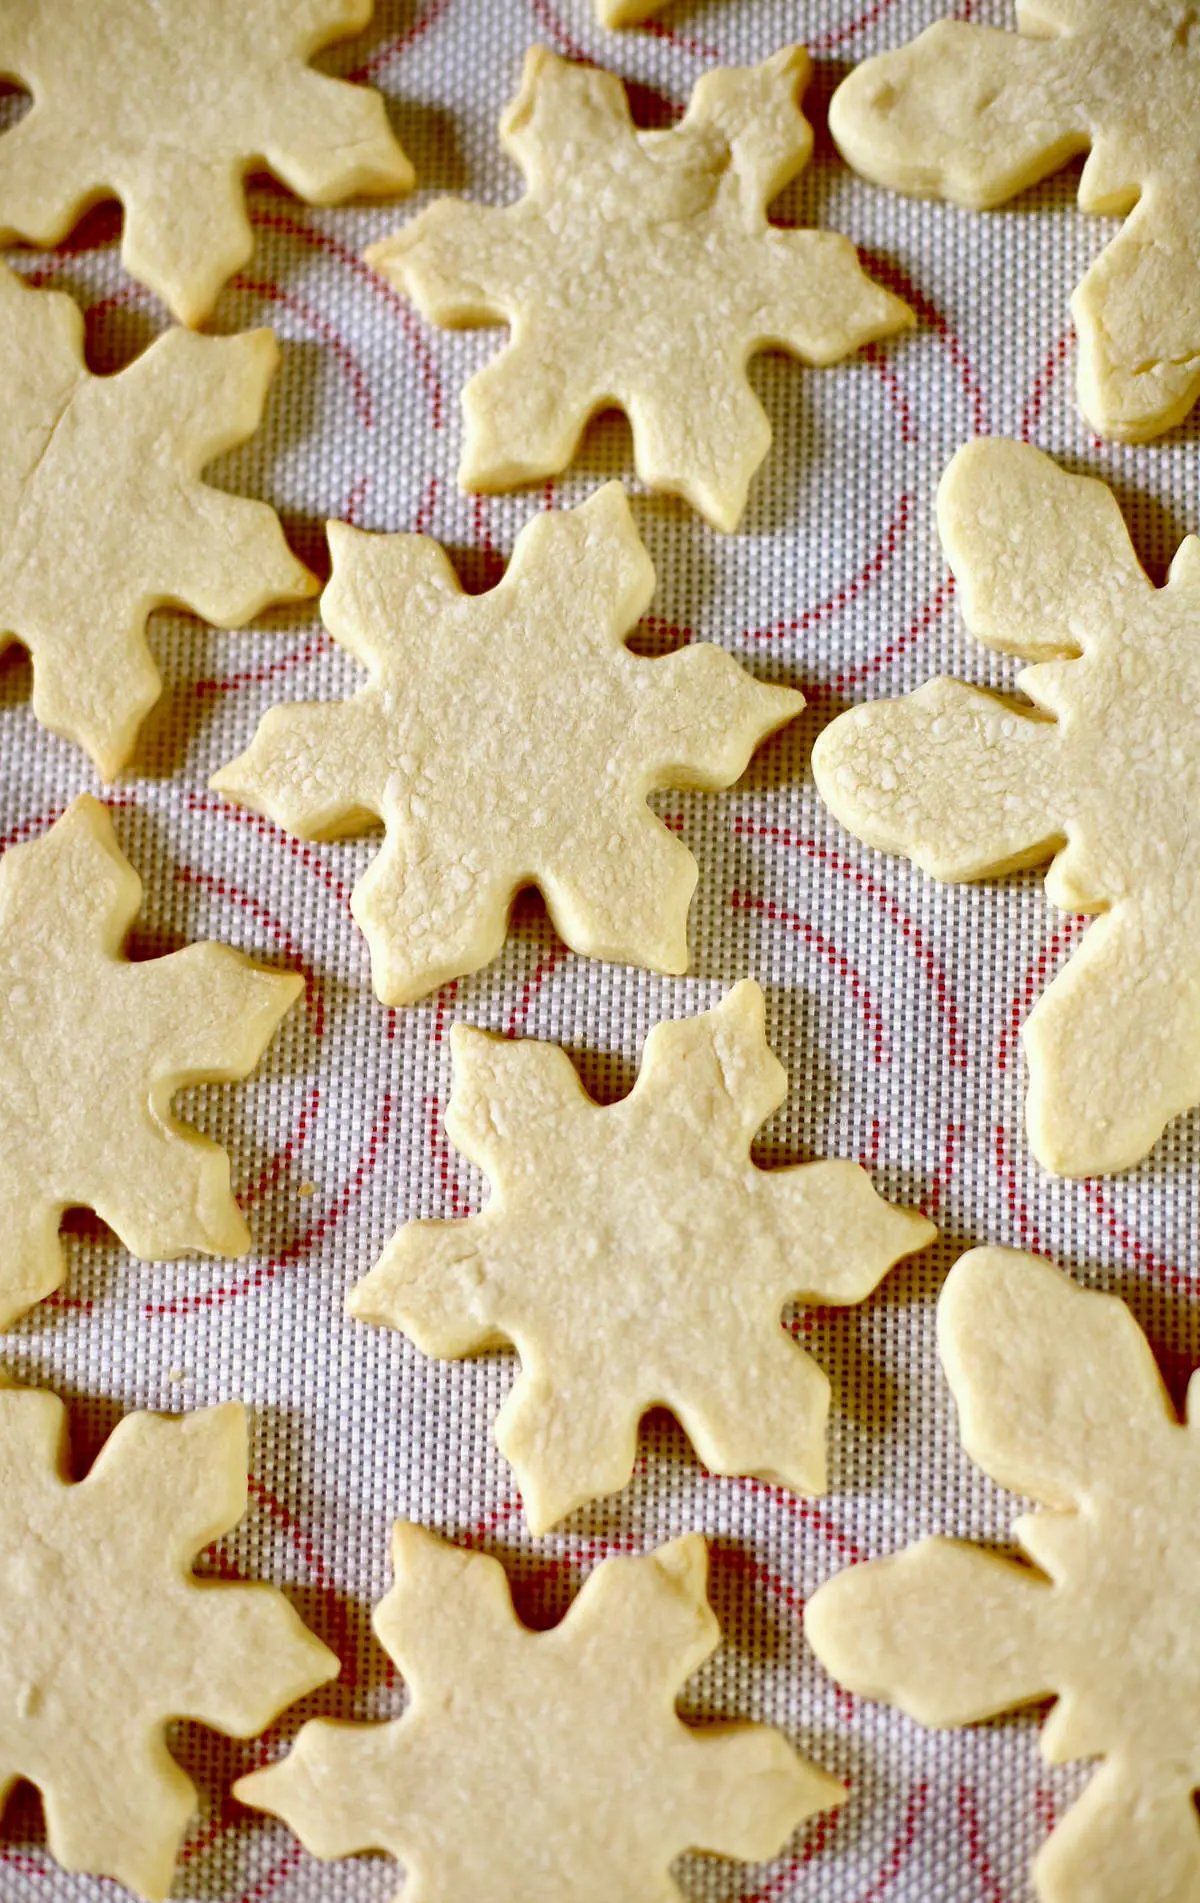
- Roll: Simply roll the dough into a quarter-inch thickness with a rolling pin.
- Cut: With a snowflake cookie cutter, or (or use any cookie shapes you want)
- Chill: After cutting the dough, chill for 20 minutes as extra insurance that the details of your cutouts will stay put and not spread during baking.
- Bake: Put cookies on a prepared baking sheet with parchment paper. The cookies will come right off after at least five minutes of cooling, then transfer to a cooling wire rack.
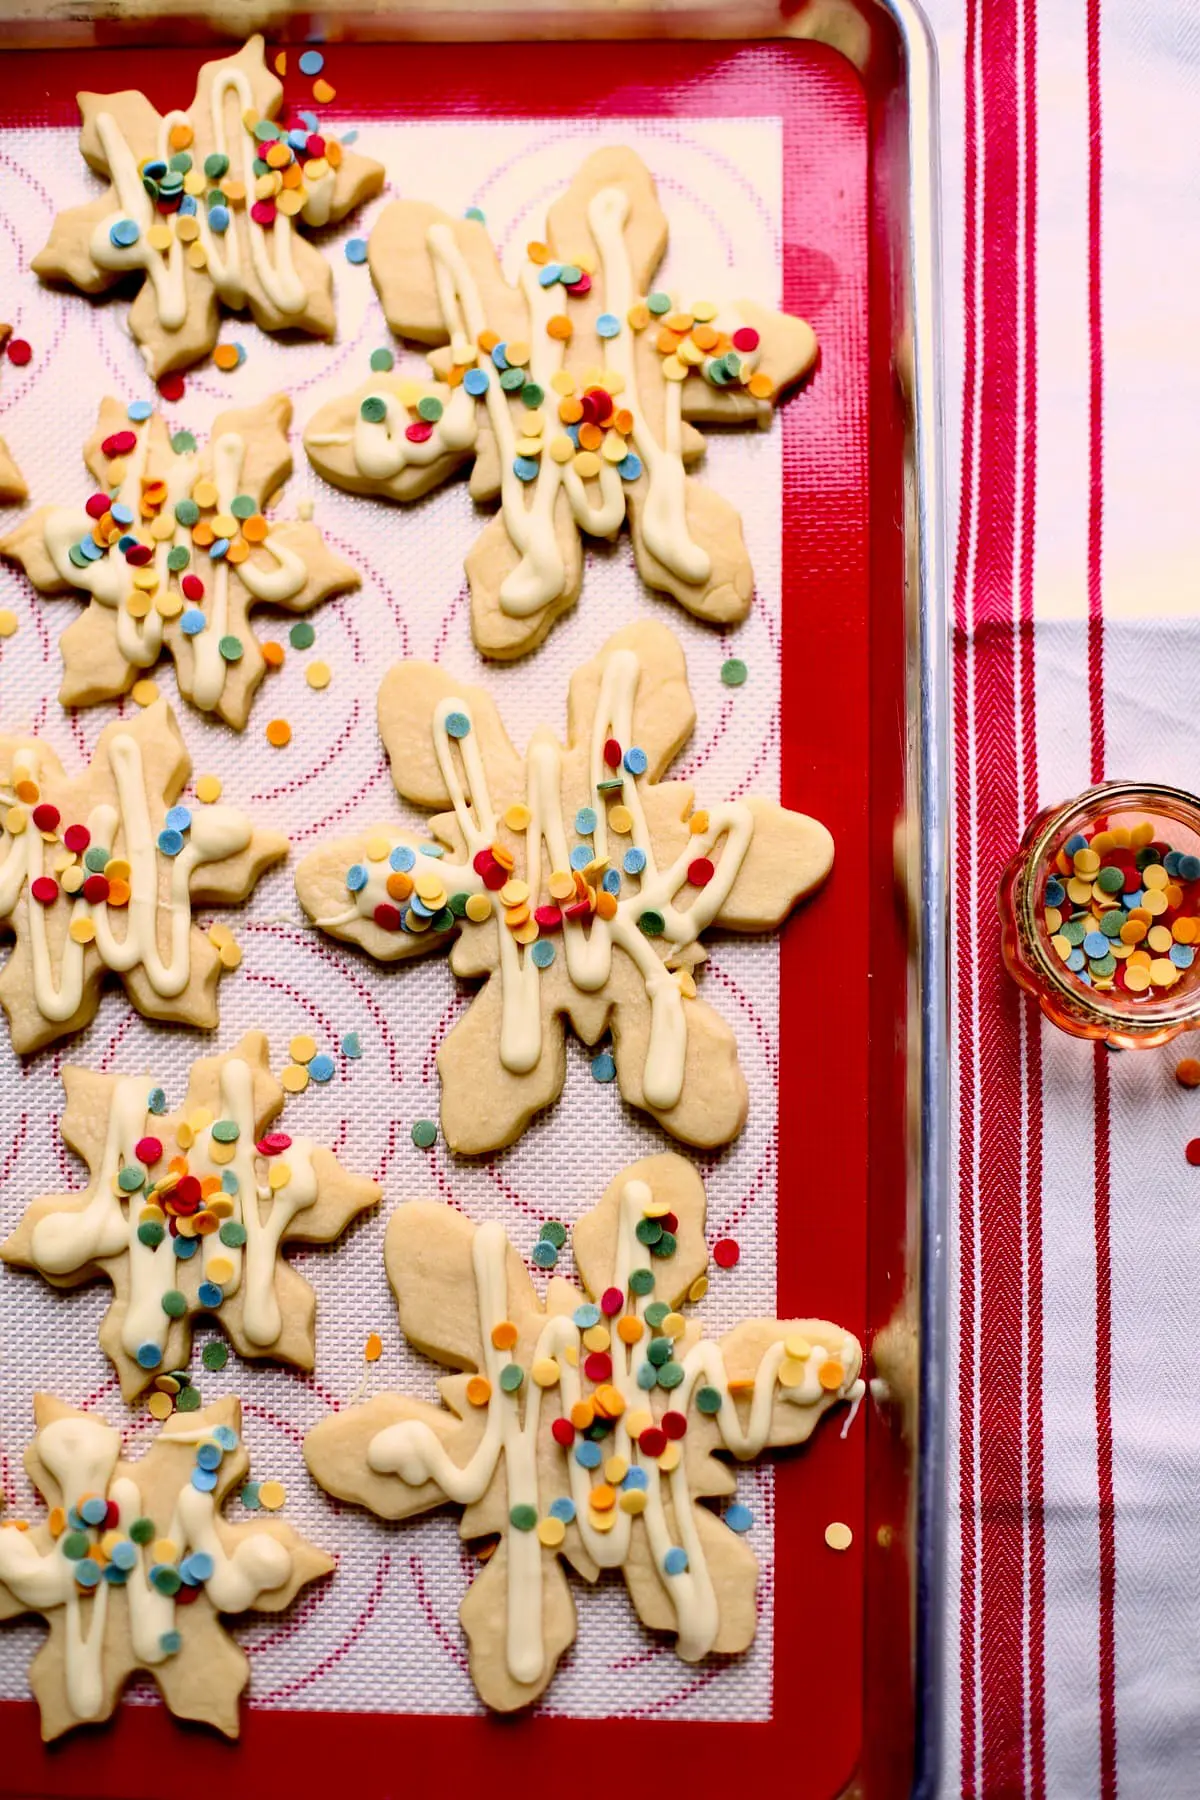
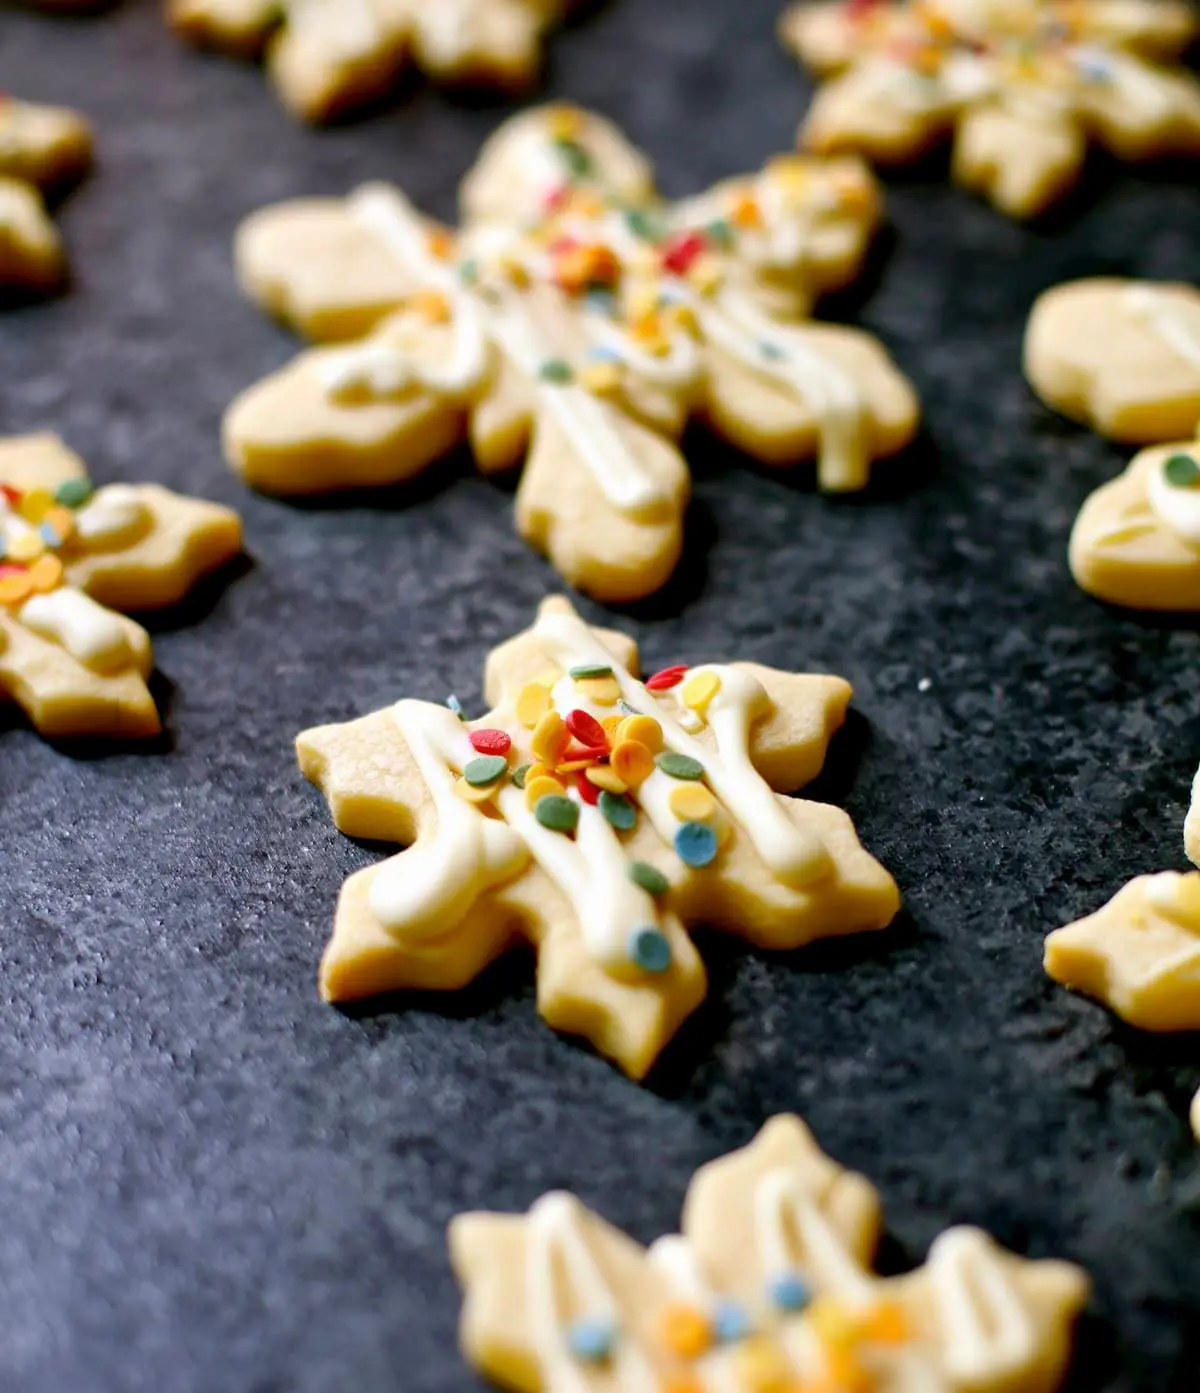
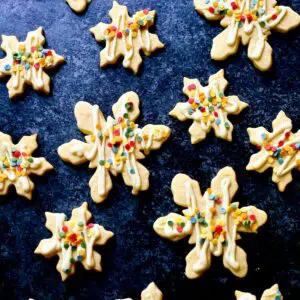
- Decorate: Make a homemade piping bag and any favorite icing to frost these cookies, but a squiggle of melted chocolate warmed to a thin consistency is incredibly fun. Same thing goes for sprinkles.
Expert Tips
This is an easy recipe, and here’s a few tips to make it even easier:
- Make the dough ahead of time and freeze it. Just shape the uncooked dough into a lightly flattened disc, wrap well in plastic wrap and foil, and freeze for up to 60 days.
- Chilling the dough after you’ve used the snowflake cut-outs is extra insurance that the cookies will retain their shape when baking.
- For decorating your snowflake cookies and to keep things from getting messy, use a gallon-sized plastic bag set inside a jar or wide-mouthed glass, then spoon the melted white chocolate inside the bag. Twist the top of the bag when ready to use, then snip off the tip of the bag with scissors and drizzle the chocolate on the cookies.
Extra Tips for Cutting Cookies
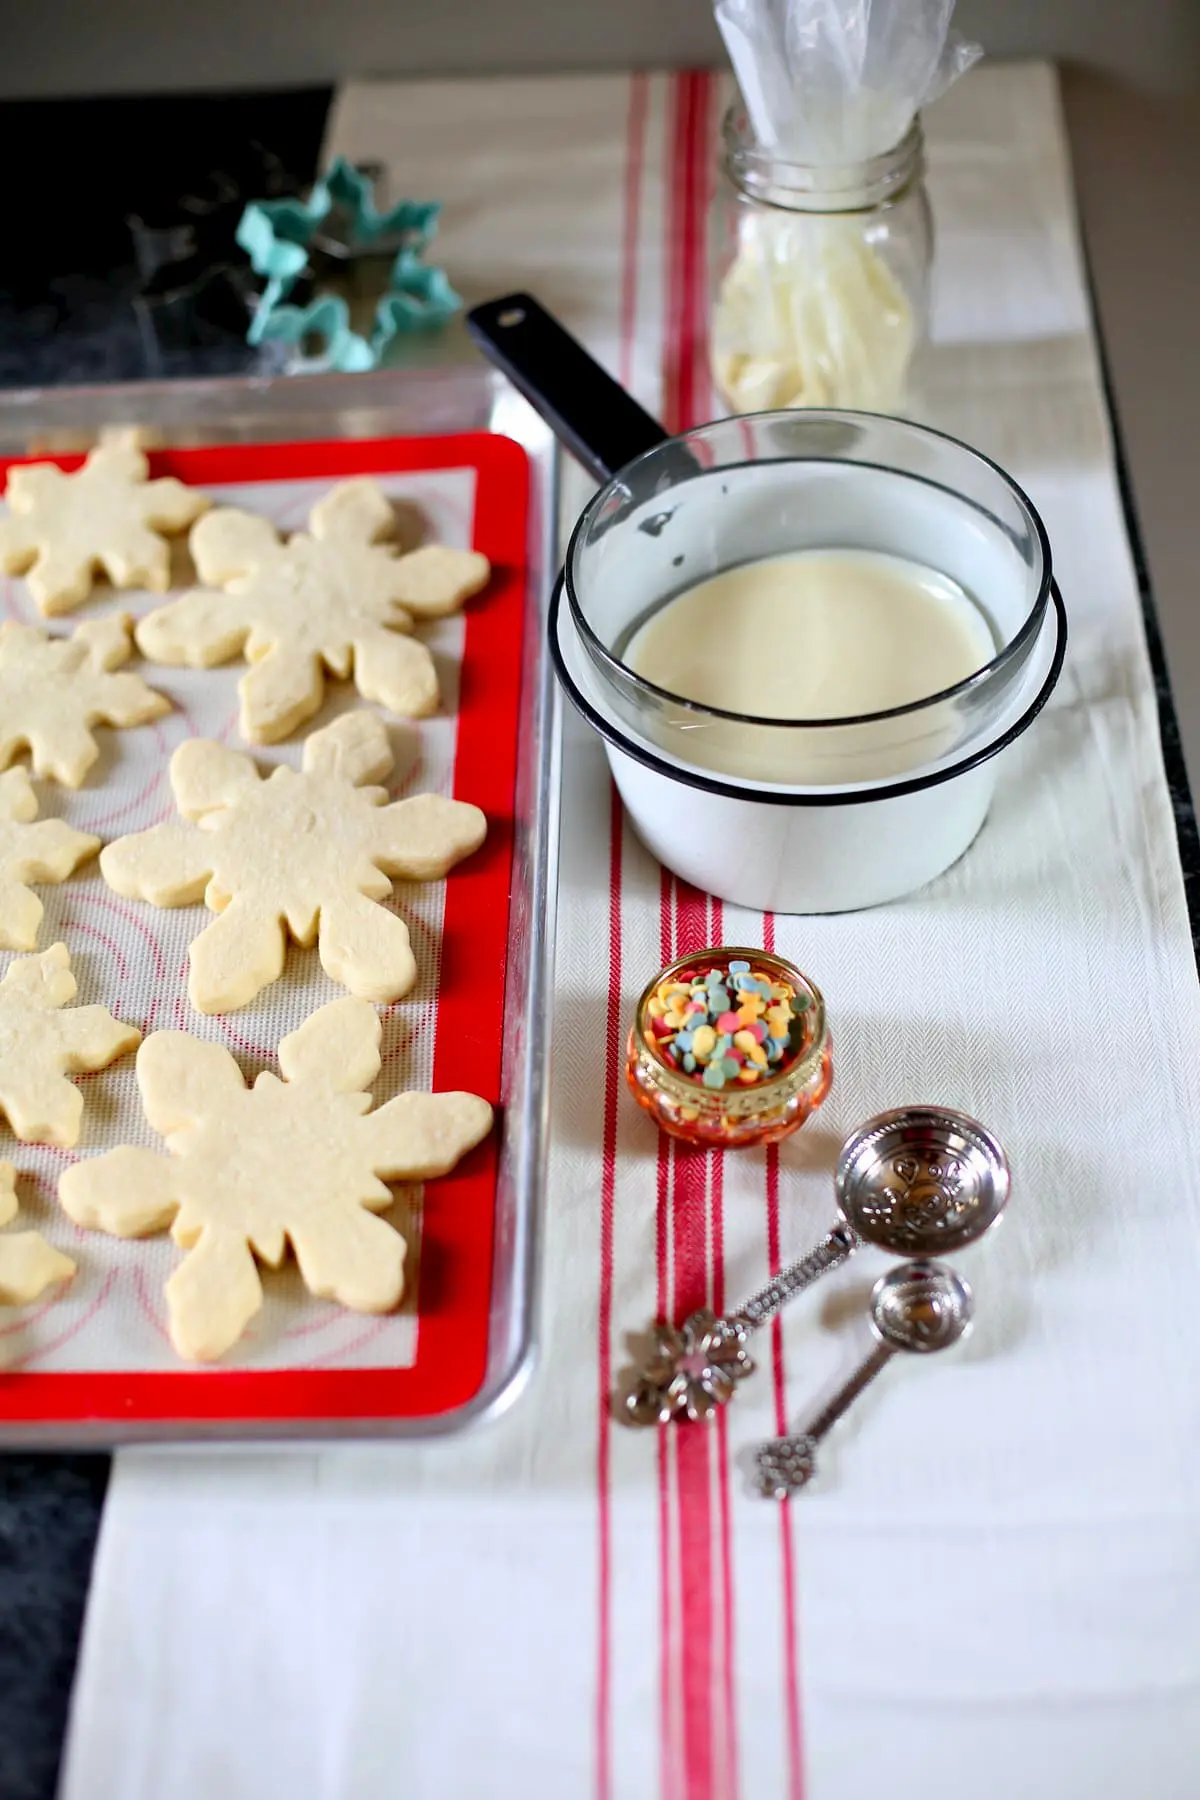
- How to make sure you’re cookies are thick enough? The dough in this recipe should be rolled out to 1/4 thickness, so grab a measuring tape to check. You don’t want these cookies too thin or you’ll sacrifice softness.
- Don’t have a snowflake cookie cutter? You could also use a tree, a candy cane, or even a plain round shape. Any shape will look and taste fabulous!
- How to make sure your cookies don’t stick? Be sure to line your baking sheet with parchment paper or silicone mat liners or parchment paper for easy removal after baking to keep your sugar cookies looking perfect.
Serving Ideas
- These cookies look pretty amazing on a big serving platter served with coffee, tea, dessert wine served alongside, and maybe some other nibble-y foods like Veggie Cups with Hummus, Sweet and Spicy Almonds, and Goat Cheese Toasts with Cranberry Compote.
- Put a few of these cookies in a clear cellophane bag tied with a red silk ribbon to gift to co-workers and friends.
- Use as a party favor after a gathering of friends and family…who wouldn’t love this?
- White Chocolate Snowflake Cookies are great for a cookie exchange too, so are Ginger Spice Biscotti with White Chocolate and so are these good old Favorite Chocolate Chip Cookies these little Jam Pies and these outstanding Chocolate Chunk and Pecan Cookies.
- Cookies are very good after a nice dinner, and Baked Pasta with Chicken Sausage or Creamy Chicken Enchilada Soup made in the slow cooker fits the bill perfectly.
Frequently Asked Questions
Use an airtight container and layer the cookies carefully between sheets of wax or parchment paper. Don’t try to pack them tightly or they’ll break! These will taste fresh for a few days.
Yes! Next time, use milk or dark chocolate, or use food coloring in the melted white chocolate to mix things up!
Absolutely! Just wrap it well and use within 30 days. Defrost the dough for about an hour before attempting to roll it out on a surface with a little flour so it won’t stick!
More Recipes to Try:
- Butterscotch Shortbread Dipped in Chocolate One of the best shortbreads out there…amazing!
- Overnight Brioche French Toast Casserole: A tasty recipe that makes 6-8 servings.
- Peanut Butter and Jam Cookies An absolutely delicious peanut butter cookie, made even better with jam!
- Apple Butter Cookies: Soft and full of wonderful flavor.
- Vegetables to Serve with Turkey: A list of favorite side dish recipes!
- Lemon Shortbread Cookies Thick, soft and full of fresh lemon flavor, these are SO good!
- White Chocolate Popcorn with Sprinkles: Fun and festive, this is easy to make too!
- Tiny Chocolate Chip Cookies: So cute, so fun and bet you can’t eat just one!
- Decorated Chocolate Dipped Strawberries: A fun and delicious way to eat fresh strawberries. Story Link.
- Mini Blueberry Pies: A delicious little pie made easy with store-bought pie crust.
If you’ve tried these Chocolate Snowflake Cookies, or any recipe on Studio Delicious, please tell me about it in the comments below, I’d love to hear from you!
Looking for more tips and fresh, homemade recipes? Join my email list, tag and follow me on Instagram using #studiodeliciouseats, follow my boards on Pinterest, and see what I’m up to on Facebook and Twitter!
Chocolate Snowflake Cookies
Ingredients
- 2 sticks Unsalted butter, softened 8 ounces
- 1 cup Sugar
- 1 Egg, large
- 1 teaspoon Pure Vanilla extract
- 3 cups Flour
- 2 teaspoons Baking Powder
- ½ teaspoon Salt
- ½ pound White Chocolate, melted
- 2 tablespoons Sprinkles, for decorating
Instructions
- Heat the oven to 375F and line two large baking sheets with parchment paper or non-stick baking mats.Beat the softened butter in the bowl of a stand mixer with paddle attachment or with an hand-held electric mixer for two minutes until fluffy. Add the sugar and beat for two more minutes, scraping down the sides as needed. Add the egg and vanilla and mix to combine for another 30 seconds until incorporated. Add the flour, baking powder and salt and beat on low speed for 1-2 minutes until the dough begins to come together, then push the dough and scraps together to form a ball with your hands.Turn the dough out on a lightly floured flat surface and divide it in half with a knife.Working with one half at a time, pat the dough into a disc with your hand, then roll the dough out with a rolling pin to quarter-inch thickness.Cut the dough with the cookie cutter one at a time, gently lifting each cookie and placing it on the prepared baking sheet as you go. Repeat with the other portion of dough, pressing the leftover scraps together and rolling them out for cutting too, so as not to waste any dough.Refrigerate the sheets of unbaked cookies for 20 minutes. Remove from the fridge and bake in the oven for 8-11 minutes until barely golden brown on the very edges. Note that cooking times will vary a little depending on your oven. Remove from oven and cool the cookies completely on wire racks for 5-10 minutes, then carefully place each cookie on a baking rack to cool completely.
Notes
- Make the dough ahead of time and freeze it. Just shape the uncooked dough into a lightly flattened disc, wrap well in plastic wrap and foil, and freeze for up to 60 days.
- Chilling the dough after you’ve used the snowflake cut-outs is extra insurance that the cookies will retain their shape when baking.
- For decorating your snowflake cookies and to keep things from getting messy, use a gallon-sized plastic bag set inside a jar or wide-mouthed glass, then spoon the melted white chocolate inside the bag. Twist the top of the bag when ready to use, then snip off the tip of the bag with scissors and drizzle the chocolate on the cookies.
- The dough in this recipe should be rolled out to 1/4 thickness, so grab a measuring tape to check. (You don’t want these cookies too thin or you’ll sacrifice softness.)
- I used a snowflake cookie cutter here, but you could also use a tree, a candy cane, or even a plain round shape. Any shape looks fabulous!
- Be sure to line your baking sheet with parchment paper or silicone mat liners or parchment paper for easy removal after baking to keep your sugar cookies looking perfect.
Nutrition
- Super important to read the whole recipe before you begin
- Pay attention to the ingredient list and photos for the recipe
- If possible, prep your ingredients a little before you start
- Always use a sharp knife for safety
- Use the size of pan called for in the recipe
- For savory recipes, taste and season as you go
- Buy fresh, organic ingredients, locally sourced whenever possible
This recipe was originally posted in November, 2017, and was updated with new text and instructions in December, 2023.

Yummy! These sugar cookies look amazing! Perfect for the holiday season. 🙂 Thanks for sharing!
Why thank you!
These cookies are the best ever!
Thanks! 🙂
We make these every year for Christmas.