

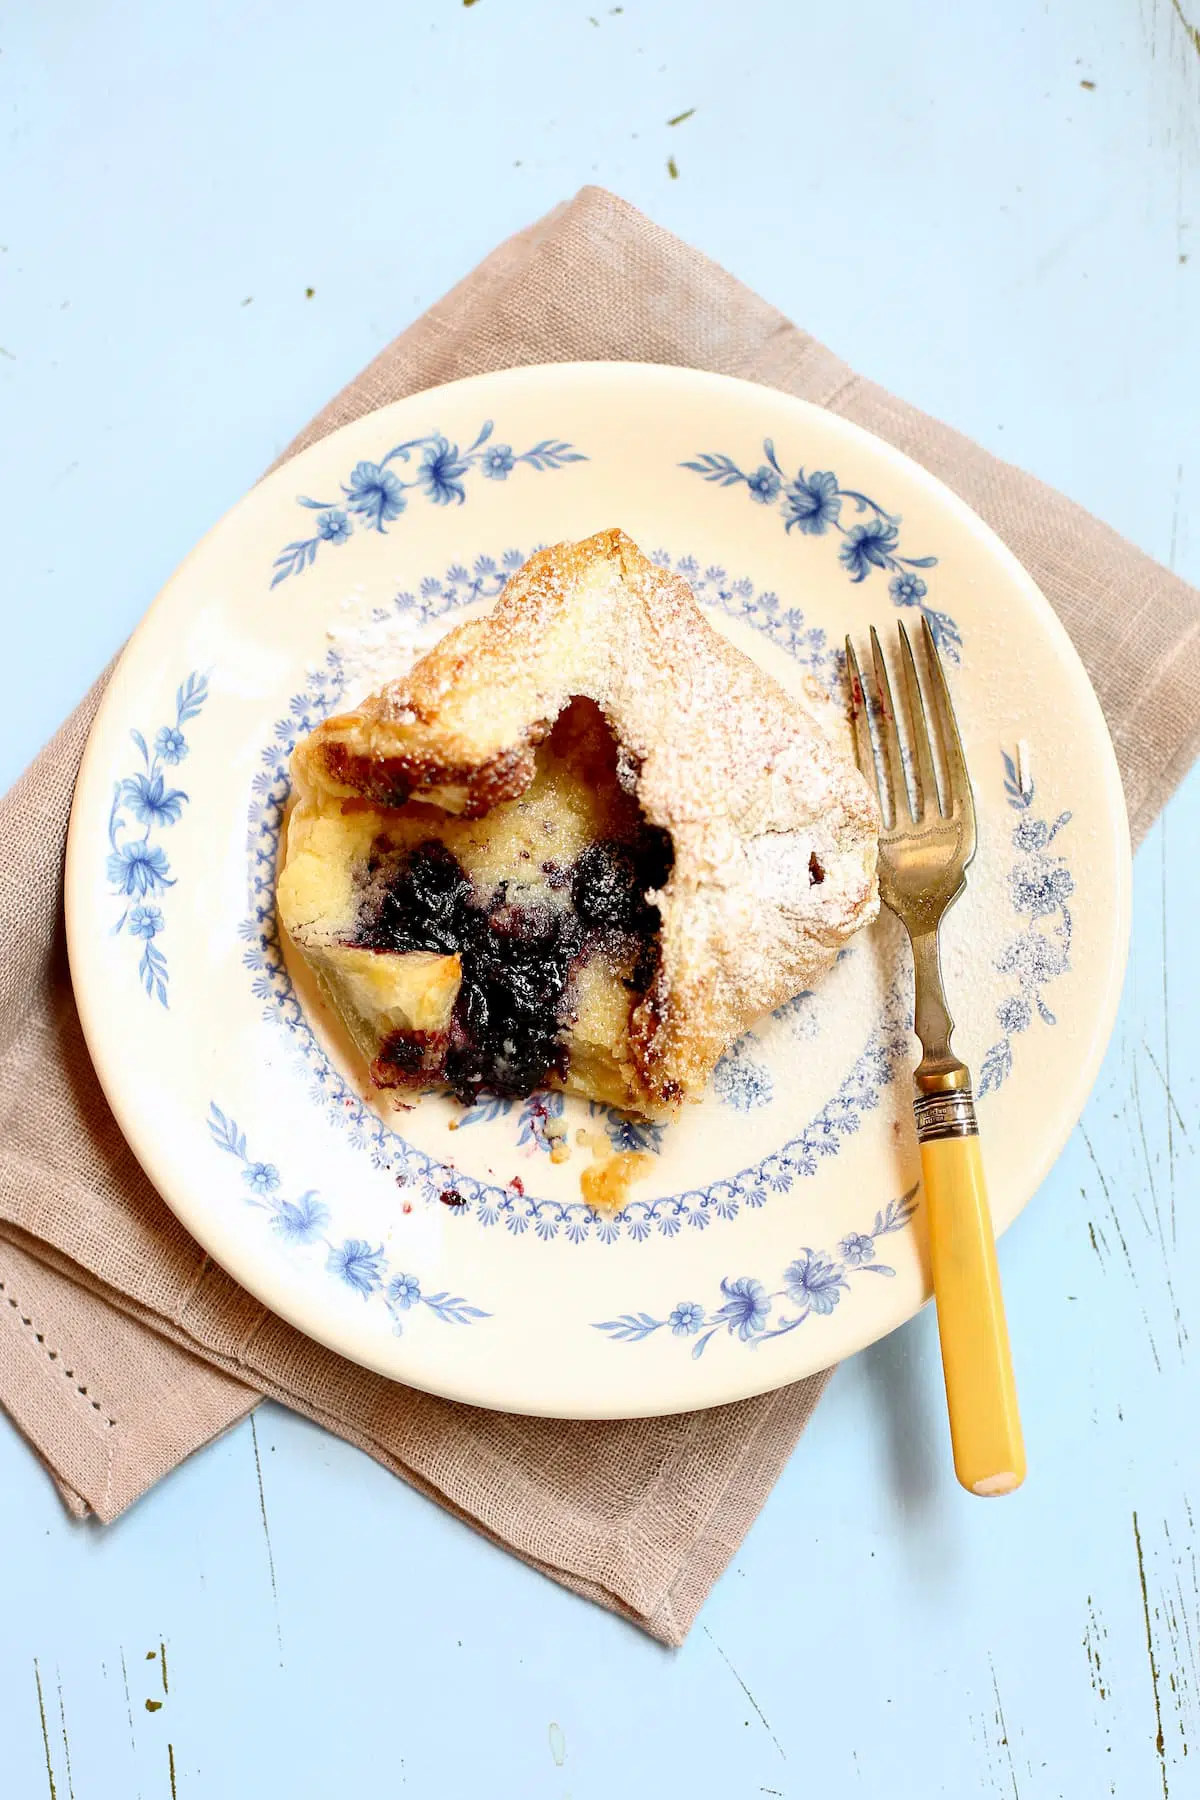
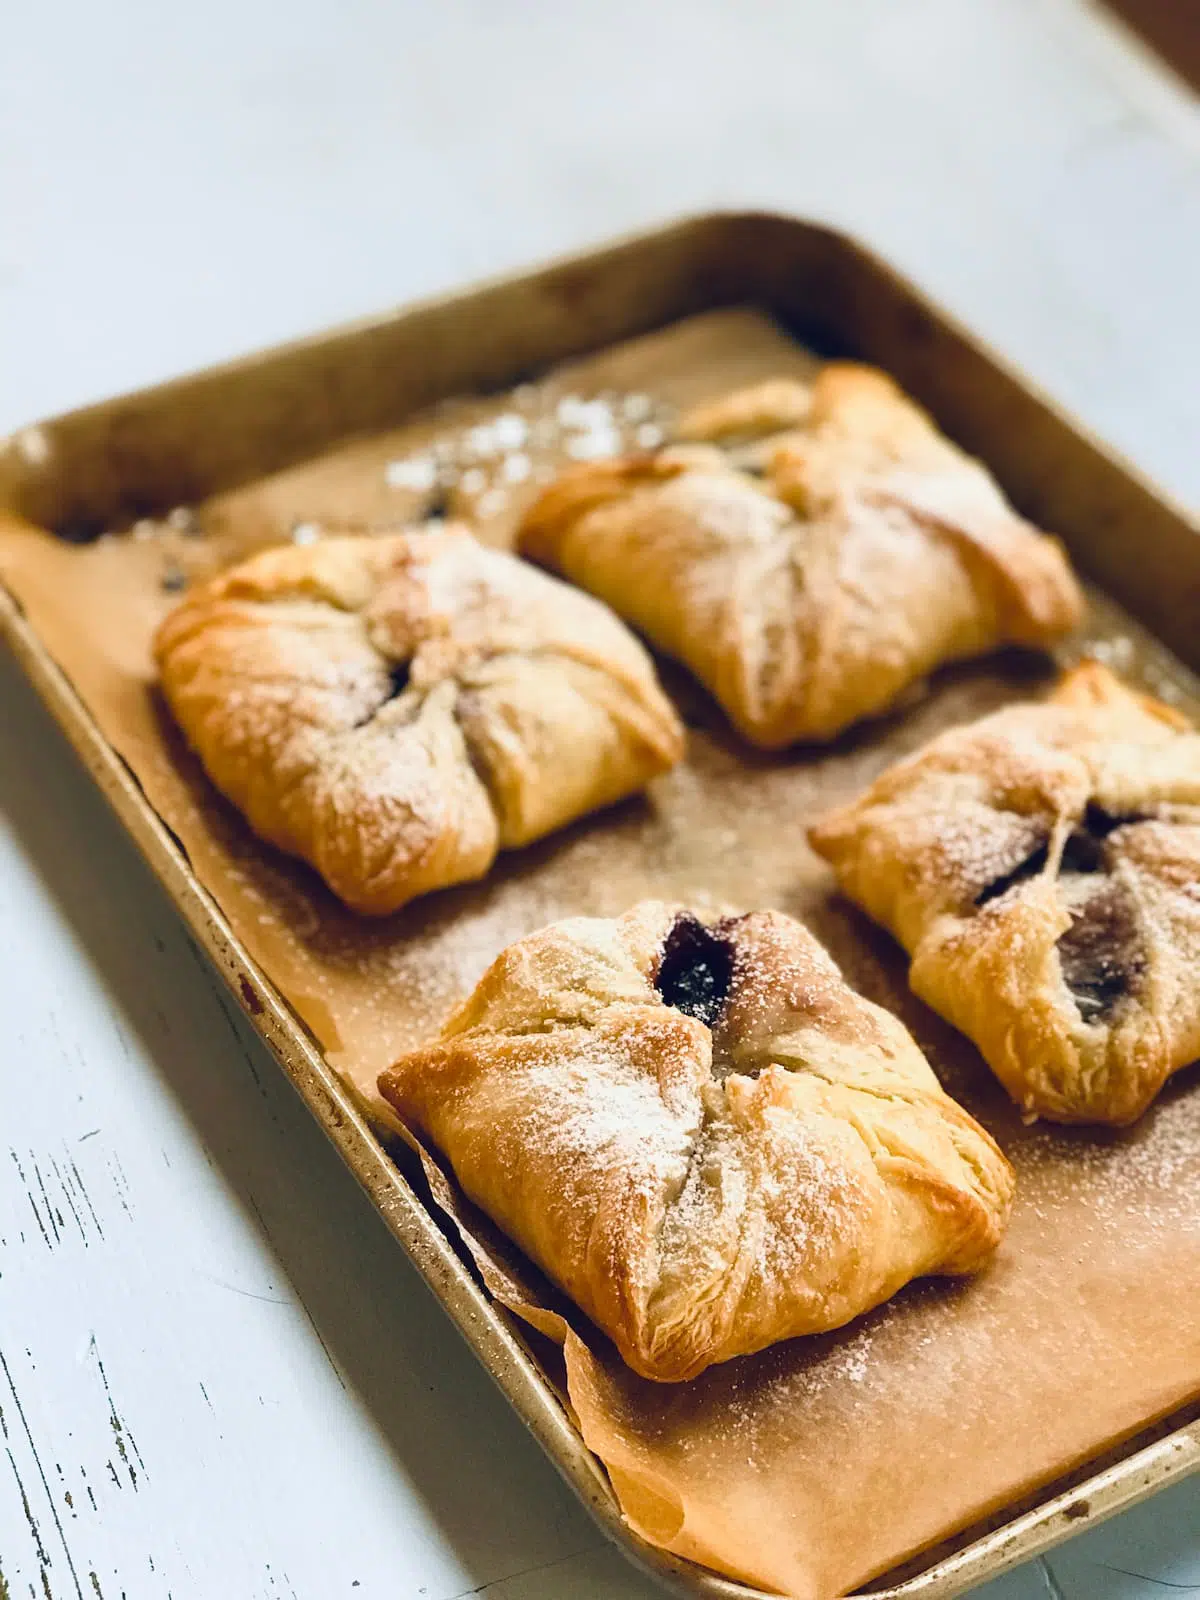
Filled with chunky cherry jam and Mascarpone cream cheese, this easy Cherry Puff Pastry Turnovers are made with store-bought puff pastry as a fantastic shortcut…they taste like they came from the local bakery!
Jump to:
Why You’ll Love This Recipe
Here’s a recipe for easy homemade pastries with cherry cheese filling that uses frozen puff pastry sheets instead of traditional laminated pastry made from a leavened dough or pie crust. Bottom line? This cherry turnover recipe is much quicker.
This pastry rises beautifully thanks to the steam from the oven, and it tastes amazing too. Here’s a few more good reasons to make these easy cherry cream cheese danishes:
- These easy puff pastry cherry turnovers taste fantastic on a weekend morning.
- Mascarpone cheese is used because of it’s rich, creamy, soft texture and mild flavor.
- No need to wait til cherry season! Frozen cherries are transformed into a sweet, chunky cherry jam to nestle on top of each turnover.
- Puff pastry sheets are easy to find in the freezer section of the grocery store.
- If you’re interested in other brunch-y food, here’s some other recipes to bookmark for later! This exceptionally moist Banana Bread, this fabulous Fresh Banana Cake, or this very, very good Fruit Toast. Bookmark for later!
Ingredients You’ll Need
For the full recipe and list of instructions and ingredients, please scroll to the recipe card below.
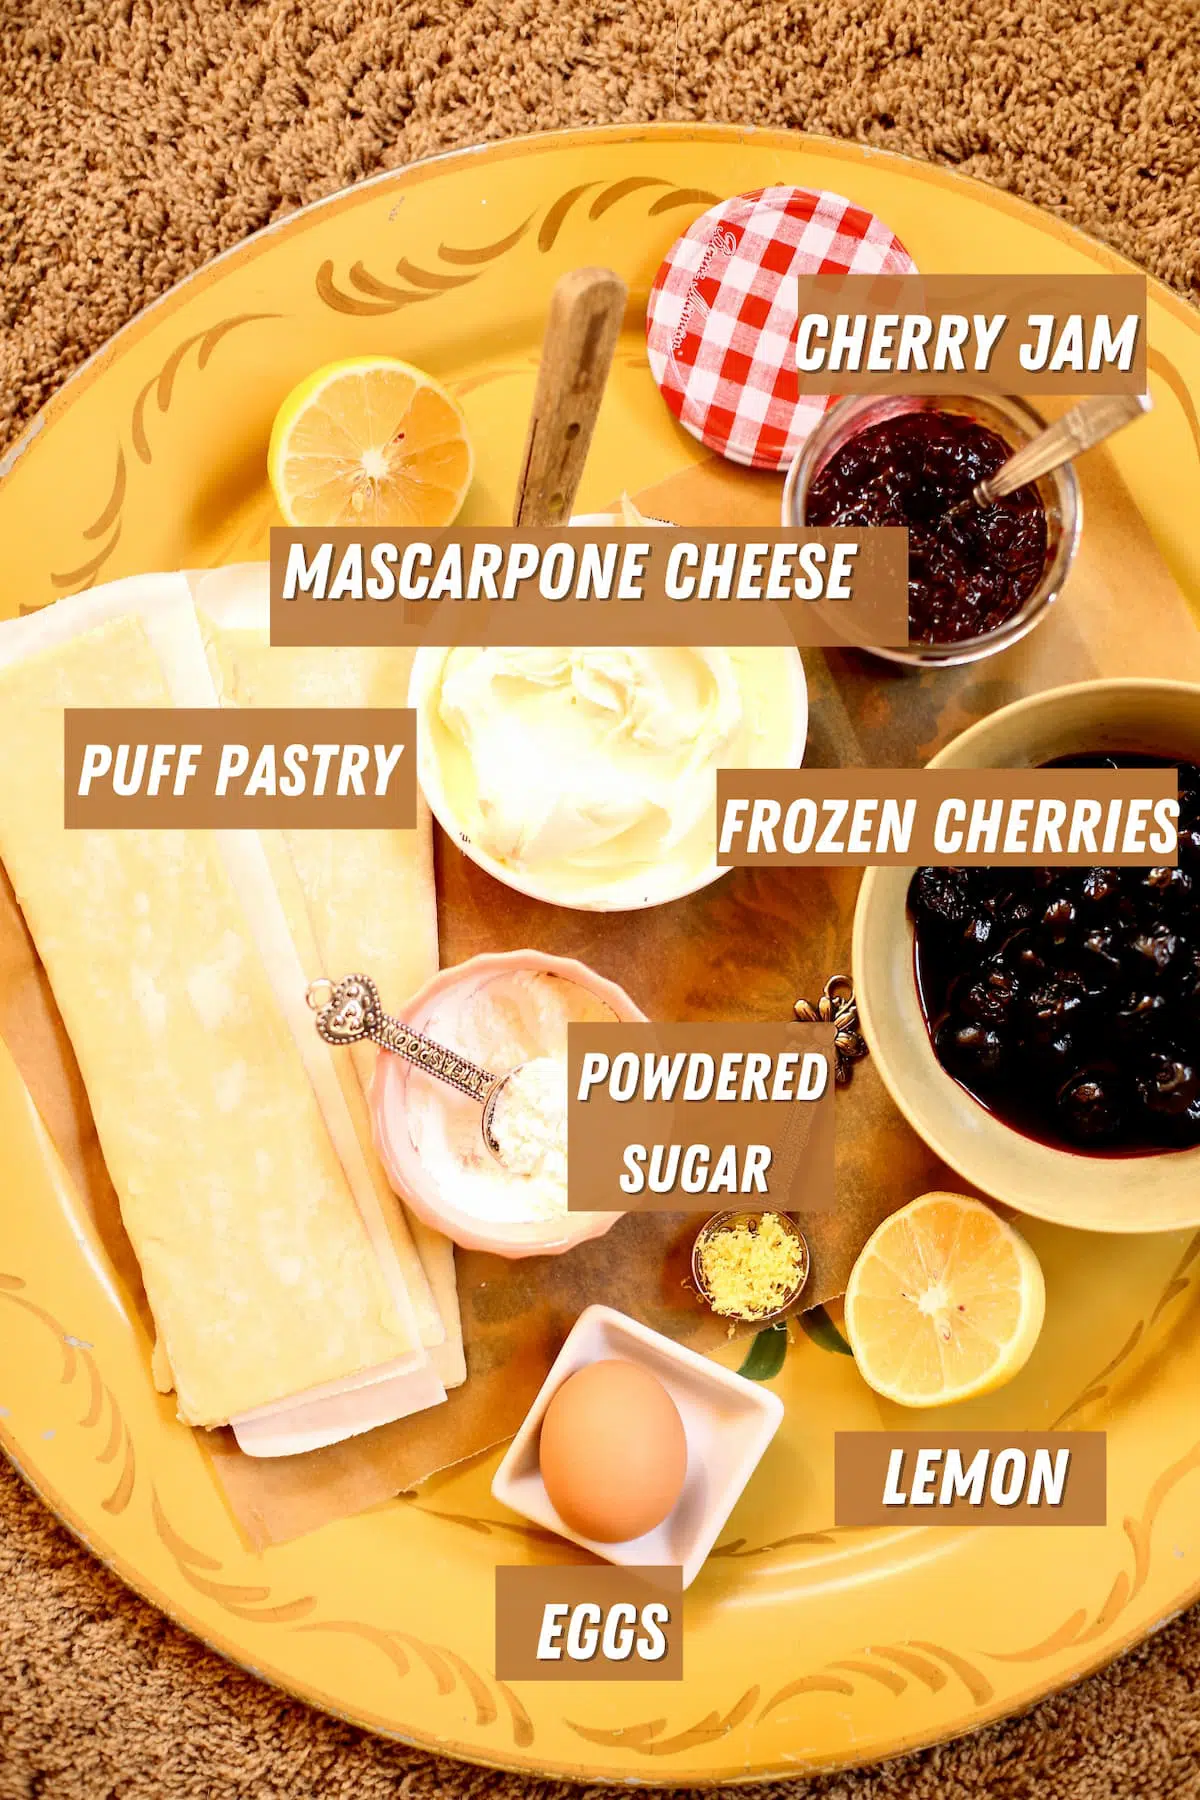
- Mascarpone Cheese: Similar to cream cheese but not as tangy or stiff, this cheese is easy to find in the cheese section and has a soft, creamy texture and mild flavor
- Puff Pastry: We’ll use a sheet of puff pastry, which usually come two to a pack in the freezer section.
- Cherries: A bag of frozen, pitted cherries (organic if possible) to make the sweet filling. Defrost in the refrigerator before you start the recipe
- Cherry Jam: To really ramp up the cherry flavors in this recipe
- Eggs: Used to hold the cheese mixture together, plus another one to seal the edges of the pastries
- Lemon: Fresh lemon juice & zest really brightens all the flavors up
- Powdered Sugar: Just for show, and to make them look pretty 🙂
Step-By-Step Instructions
For the full recipe and list of instructions and ingredients, please scroll to the recipe card below.
- Make the cherry filling by gently cooking the defrosted cherries in a medium-sized saucepan with a little cornstarch to thicken it, and some cherry jam
- While the cherries are cooling, put the cheese in a medium bowl with a (room temperature) egg yolk, a little sugar, some pure vanilla extract and lemon zest, then blend with an electric mixer
- Combine some flour with the cream cheese to help it from spreading when baked. Use a pastry brush or spatula to scrape down the sides of the bowl when mixing the cheese to make sure everything is incorporated
- Prep the puff pastry dough by defrosting, then unfolding and lightly rolling it out with a rolling pin on a work surface. We’re striving for a seamless dough sheet, cut into four equal squares with a sharp knife or pizza cutter
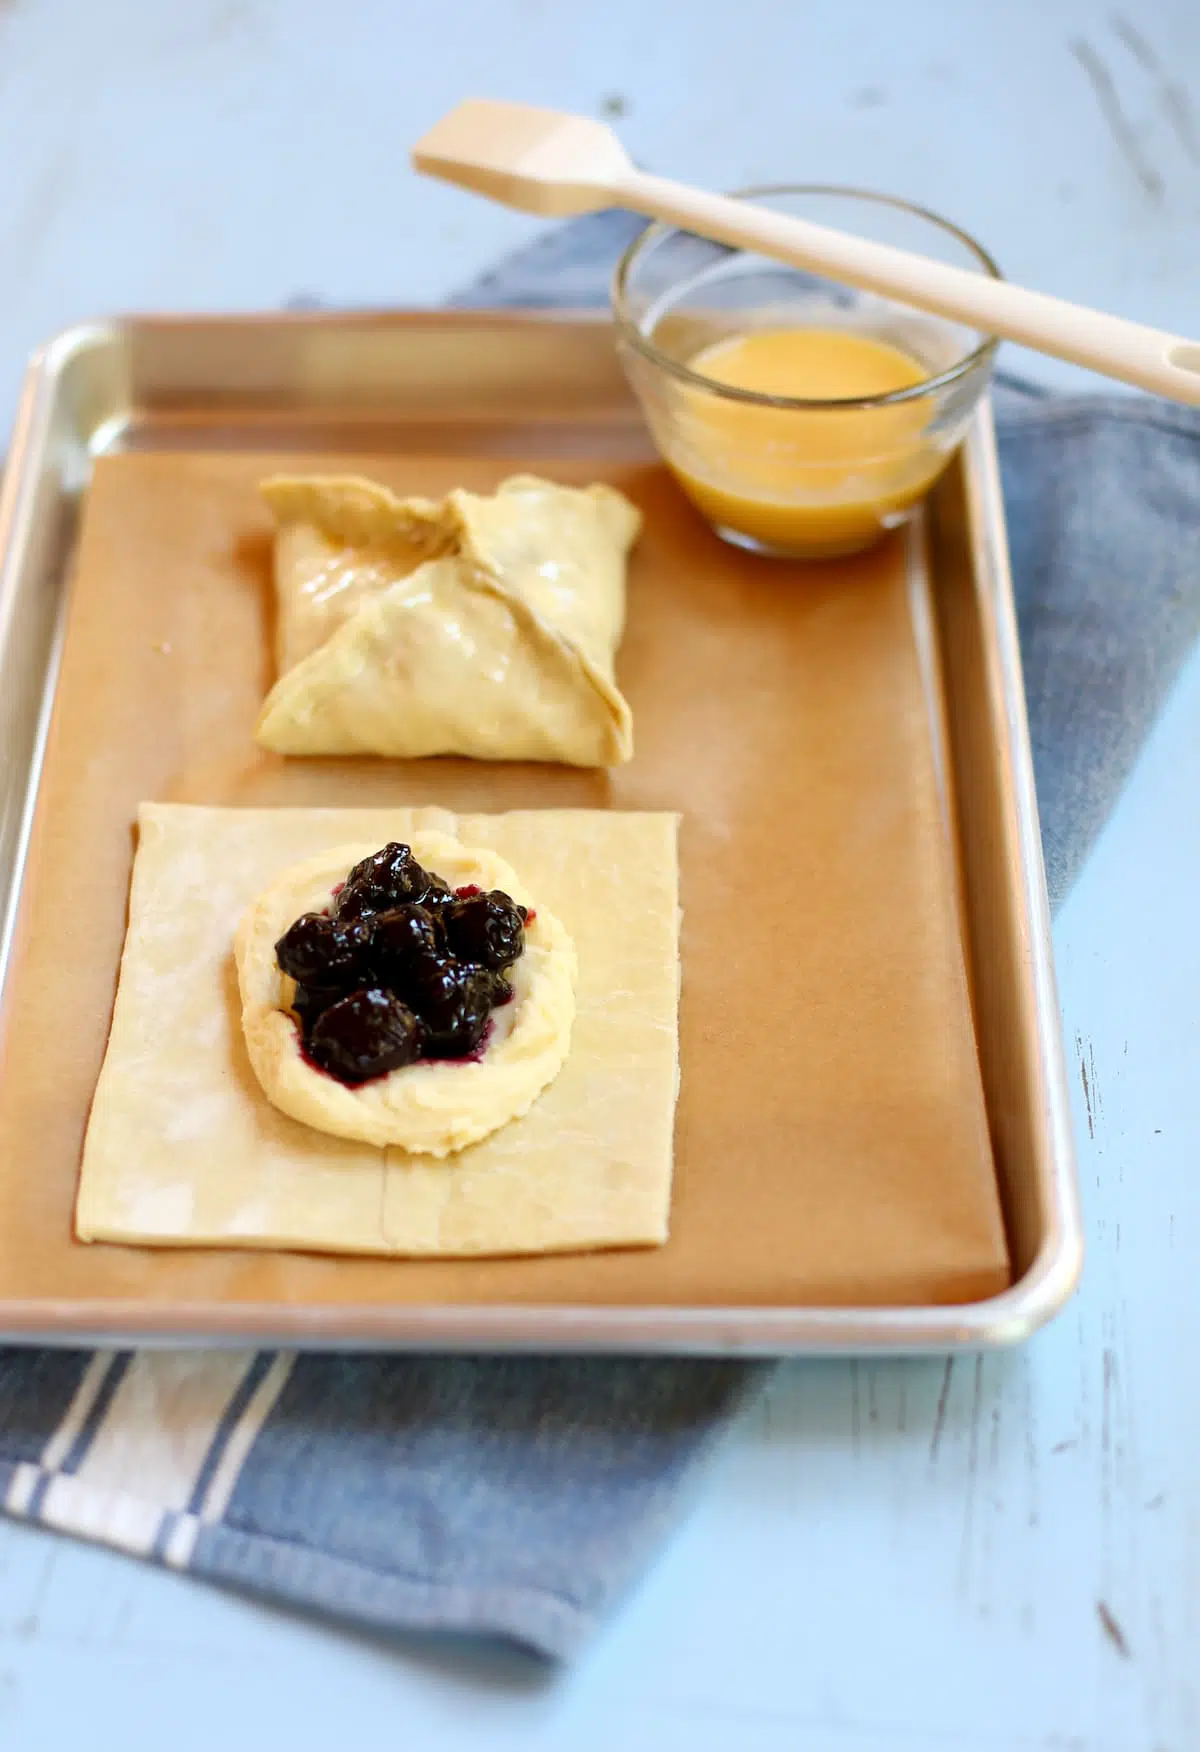
- Add some cheese in the center of each square, making an indent with the back of your spoon to make a little well, then spoon a heaping tablespoon of the cooled cherry mixture on top.
- Brush all four sides of the 4-inch square with egg wash, then gather up the four corners and pinch the sides edges together to seal
- Carefully place turnovers on a prepared baking sheet. Use a small bowl to make an egg wash to brush on top of each pastry.
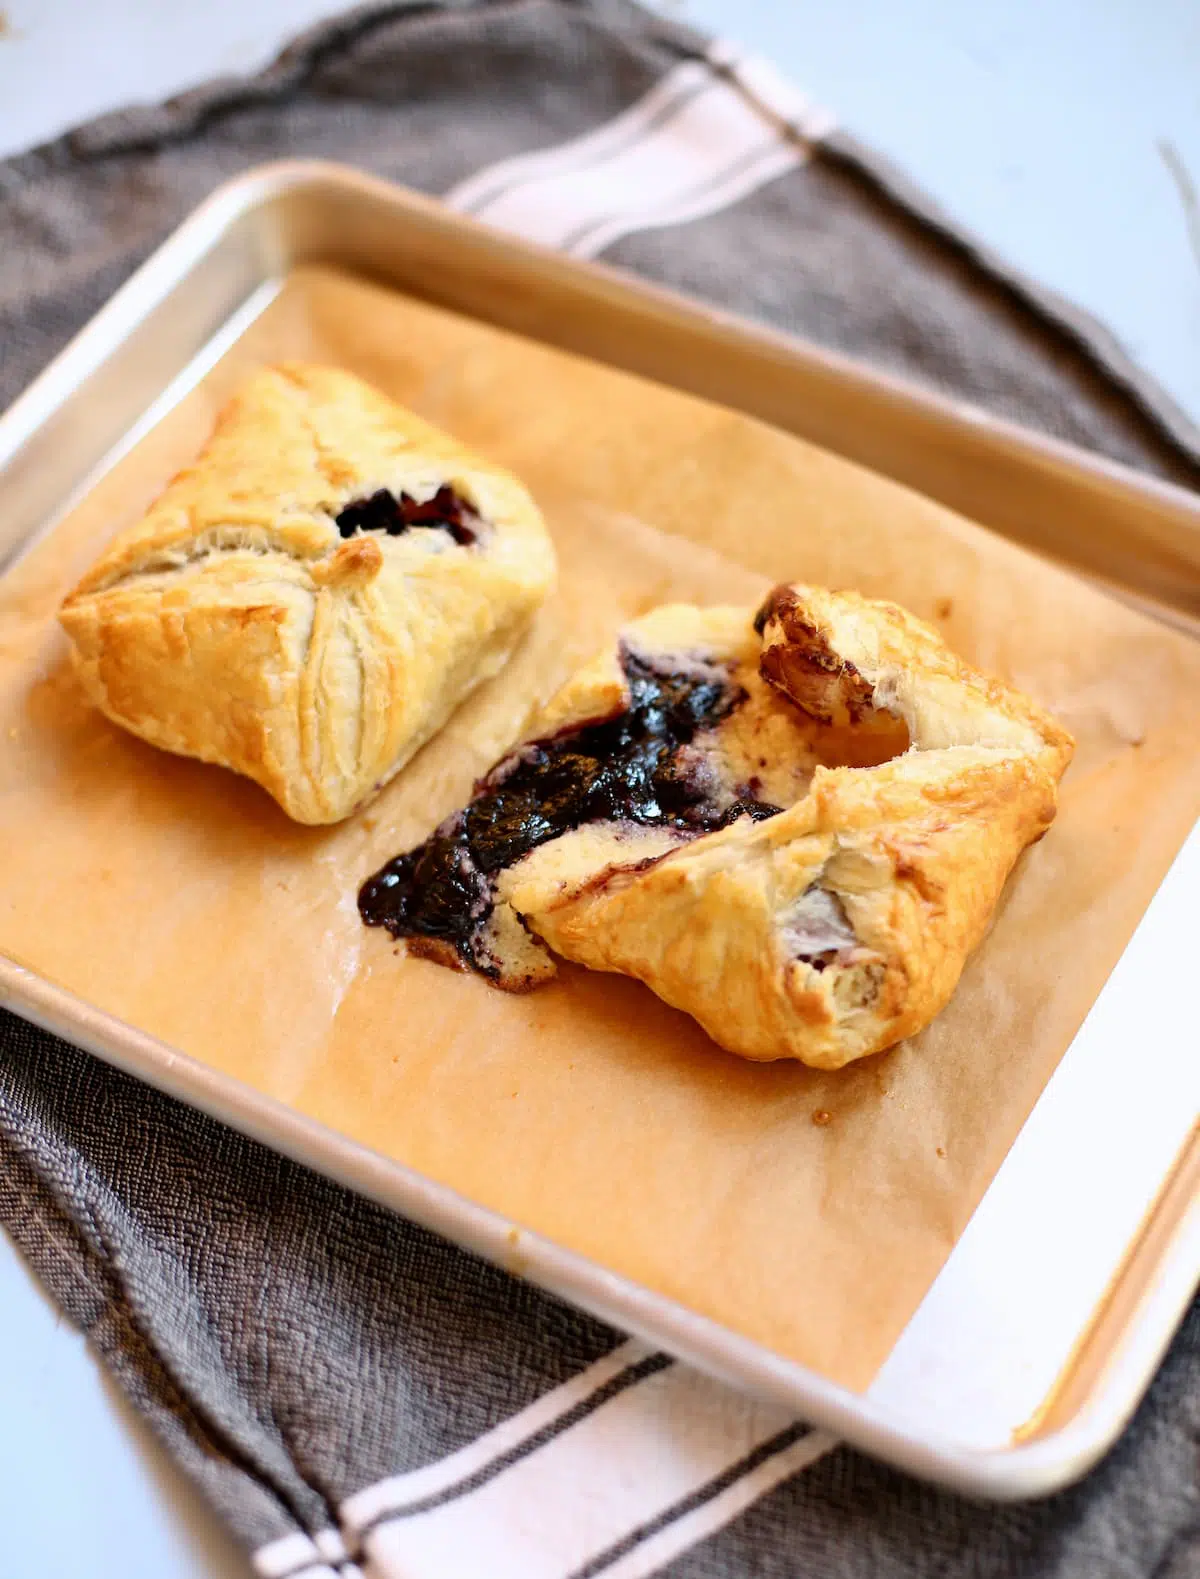
- Bake turnovers to a deep golden brown, then cool, sprinkle with powdered sugar and enjoy!
Expert Tips and Possible Substitutions
- Be sure to line your baking sheet with parchment paper to avoid sticking. You can use silicone reusable baking sheet liners instead too
- Use the back of a spoon to make an indentation in the cheese mixture, then spoon the cherry mixture on top of that. This will help the cherries stay in place with baking.
- Be sure to freeze the assembled pastries for 15 minutes before baking. This will help them stay together from the heat of the oven.
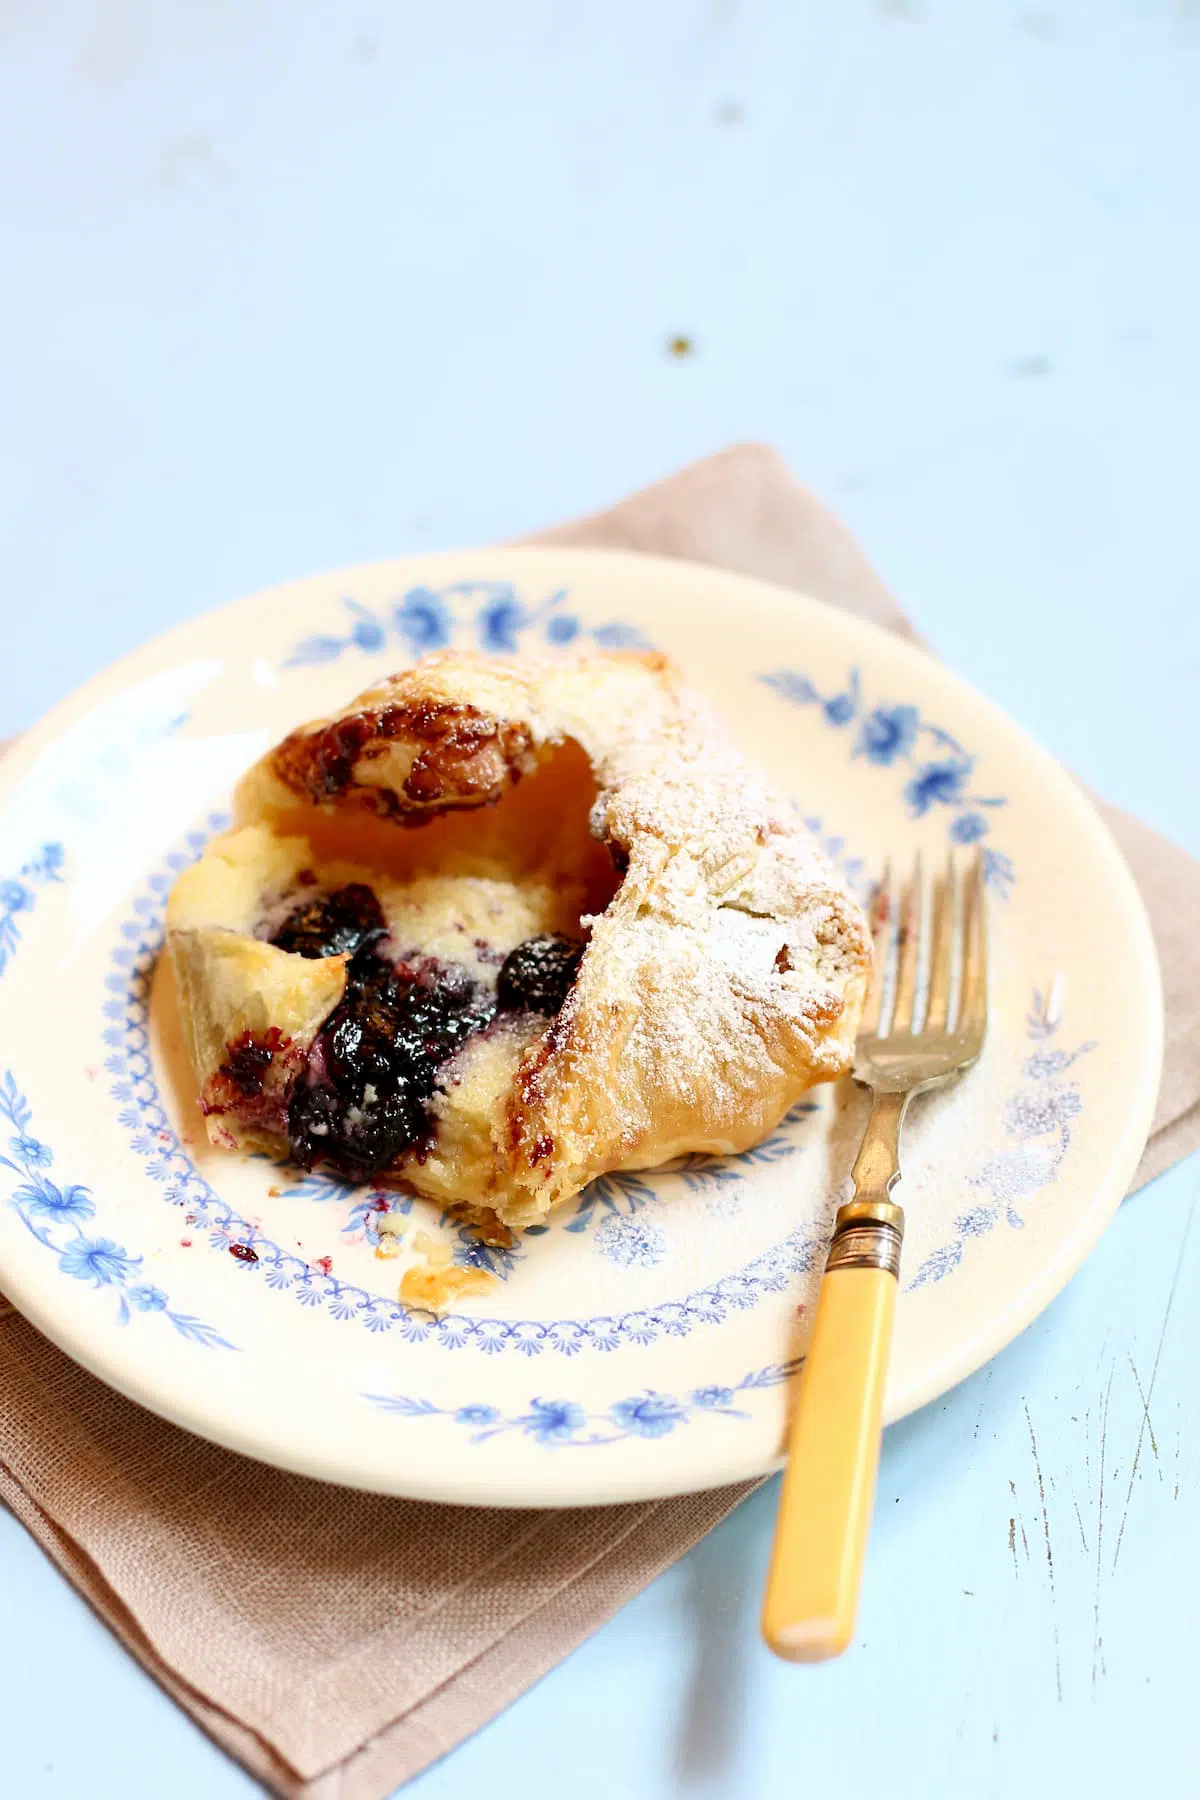
- That said, if they bust apart like in my photo above, it’s not the worst thing in the world! They will still look and taste great!
- Don’t like cherries? Experiment with other fruits using the same technique, but best to stick to berries in this case. Blueberry or raspberry are good places to start, and it’s easy to find jam in these flavors too.
- The cherry filling for this recipe needs to completely cool before assembling the pastries. After its cooled down initially, best to refrigerate it for 30 minutes or more, or overnight.
- You’ll have a bit of the cherry mixture left over, which is amazing on oatmeal or plain Greek yogurt, and will last 5-7 days in the refrigerator!
- Don’t have time to make homemade puff pastry? Me neither. You’ll spend way less time using Pepperidge Farms puff pastry. (not sponsored, its a product I use all the time.)
Serving Ideas
- There’s nothing wrong with having one of these cherry cheese danish straight from the oven with a hot cup of coffee. Or this amazing hot chocolate. Not one thing.
- You could double this recipe (or make them smaller) and have them with a brunch spread of Zucchini Potato Frittata, some fresh salads like this delightful Carrot and Currant Salad a fresh, crunchy Celery Parmesan Salad, and some crispy bacon or link sausage and sliced seasonal fruit.
- Bookmark this Power Breakfast Bowl too 🙂
- You could go over the top and also indulge in these tasty Waffles with Spiced Apples too (keep the waffles warm in a low oven if making for a crowd).
- And don’t forget dessert! You could go the fruit dessert route, like this reader favorite Strawberry Cheesecake in a Jar, or Mini Blueberry Pies, this easy and fabulous Ice Cream Cake with Peanut Butter Ganache, or make this impressive Chocolate Hummus Dessert Tray with some little cookies alongside. Or, just make these incredible tasting Peanut Butter and Jam Cookies and this Hawaiian Shortbread Cookie Recipe and call it good! 🙂
Frequently Asked Questions
Yes you can make these the day before, assembled, but keep them well wrapped and refrigerated and add the egg wash right before baking.
Yes, they freeze beautifully too! Don’t bake the danish before freezing. Just assemble them, minus the egg wash, wrap well and freeze for up to 30 days. When you’re ready to bake, defrost for 30-40 minutes, brush on the egg wash and bake according to the directions. Don’t put the egg wash on the outside of the pastries before freezing! Also note that the total baking time might be a little longer to achieve a golden brown finish when they’ve been stored in the freezer this way, so it may take a few minutes longer.
For best results, eat this pastry the same day it’s made. If there are a few left over, wrap them up individually, or use an airtight container to store them in the refrigerator for a day, maybe two.
Nope. Though almond extract works deliciously with cherries, if you don’t have it or don’t to buy it, just use pure vanilla extract instead.
Then just use regular or light cream cheese (not non fat!) instead. Bring it to room temperature for about 30 minutes to make mixing easier.
Well, good news. Use prepared cherry pie filling. Just a heaping tablespoon, and you’re all set 🙂
More Recipes
- Rosa Parks Pancakes Recipe: Peanut buttery good!
- Overnight Brioche French Toast Casserole Recipe: A very good weekend recipe.
- Philadelphia Strawberry Cheesecake Snack Bars Recipe: Amazingly good!
- Cherry Almond Oatmeal: A special take on morning oatmeal!
- Triple Chocolate Cookies: Fudgy and brownie-like with deep chocolate flavor
- Dark Cherry Smoothie: Cold and refreshing with a burst of cherry!
- Baked Chicken with Cherry Tomatoes: Savory and delicious, super easy, too!
- Fresh Cherry Blackbottom Milkshakes: A great dessert year-round!
- Decorated Chocolate Covered Strawberries: These are special and delish!
- Lemon Shortbread Cookies: Thick, soft and full of fresh lemon flavor!
If you’ve made Cherry Puff Pastry Turnovers or any recipe on Studio Delicious, leave a recipe rating and tell me all about it in the comments below!
Looking for more tips and fresh, homemade recipes? Join my email list, tag and follow me on Instagram using #studiodeliciouseats, follow my boards on Pinterest, and see what I’m up to on Facebook and Twitter!
Cherry Puff Pastry Turnovers
Ingredients
- 1 10 ounce bag Frozen Cherries, pitted and defrosted (but not drained)
- 1 tablespoon Cornstarch
- ¼ teaspoon Almond extract
- 3 tablespoons Cherry preserves
- 8 ounces Mascarpone Cheese, softened
- 1 1 Egg yolk
- ⅓ cup Sugar
- 2 tablespoons Flour
- 1 teaspoon Lemon zest
- ½ teaspoon Vanilla extract
- 1 large Egg for the egg wash
- 1 tablespoon Water
- 2 tablespoons Powdered Sugar for garnish
Instructions
- Preheat the oven to 375 F degrees, and prepare a large baking sheet by lining with parchment paper or reusable silicone baking sheets.
- FOR THE CHERRY FILLINGIn a medium-size saucepan, add the cherries, the cornstarch and the cherry preserves and cook over medium-high heat until it comes to a low boil. Stir it occasionally to keep it from sticking. Let it simmer for 3-4 minutes until it's bubbly and thickened. You are looking for spoon-able, jam-like consistency, and this mixture will thicken as it cools. If it seems too syrupy after the cooking time, add another teaspoon of cornstarch and mix it in well. (The amount of liquid in your defrosted cherries may vary by brand). Transfer the cherry mixture to a glass bowl and let it cool completely and/or refrigerate before use.
- FOR THE CHEESE MIXTURE
- Add the Mascarpone cheese to a medium-sized bowl with the egg yolk, sugar, flour and lemon zest and vanilla and beat with a hand-held electric mixer until smooth. Set aside until ready to assemble the pastries.
- FOR THE PUFF PASTRY
- Defrost one sheet of the puff pastry in the refrigerator (overnight, or for several hours) before attempting to unfold it (if you don't, it will break). On a lightly floured surface, gently roll the pastry out with a rolling pin. The goal is just to remove the two big folded seams of the pastry, so just do this lightly. Cut into four squares and set on the prepared baking sheet.
- TO ASSEMBLE THE PASTRIES
- Divide the cheese mixture onto the middle of the four squares and make a shallow indentation in the middle with the back of your spoon. (This will help the cherry jam stay in place). Next, spoon a rounded tablespoon of the cherry jam into the middle of the cheese. Mix the remaining egg with the tablespoon of water and use your clean fingers or a pastry brush to add the egg wash to all four edges, like a frame. Gather the points up to the middle, and pinch together to seal. Brush a little more egg wash over the whole thing (to help with browning). Transfer to the prepared baking sheet, then bake for 28-30 minutes at 375 F degrees until golden brown. Remove from oven, cool for 15 -20 minutes, sprinkle with powdered sugar and serve.
Notes
- Be sure to line your baking sheet with parchment paper to avoid sticking. You can use silicone reusable baking sheet liners instead too
- Use the back of a spoon to make an indentation in the cheese mixture, then spoon the cherry mixture on top of that. This will help the cherries stay in place with baking.
- Be sure to freeze the assembled pastries for 15 minutes before baking. This will help them stay together from the heat of the oven.
- That said, if they bust apart like in my photo above, it’s not the worst thing in the world! They will still look and taste great!
- Don’t like cherries? Experiment with other fruits using the same technique, but best to stick to berries in this case. Blueberry or raspberry are good places to start, and it’s easy to find jam in these flavors too.
- The cherry filling for this recipe needs to completely cool before assembling the pastries. After its cooled down initially, best to refrigerate it for 30 minutes or more, or overnight.
- You’ll have a bit of the cherry mixture left over, which is amazing on oatmeal or plain Greek yogurt, and keeps for 5-7 in a sealed container in the refrigerator.
Nutrition
- Super important to read the whole recipe before you begin
- Pay attention to the ingredient list and photos for the recipe
- If possible, prep your ingredients a little before you start
- Always use a sharp knife for safety
- Use the size of pan called for in the recipe
- For savory recipes, taste and season as you go
- Buy fresh, organic ingredients, locally sourced whenever possible

Please rate this recipe and thanks for leaving a comment!