

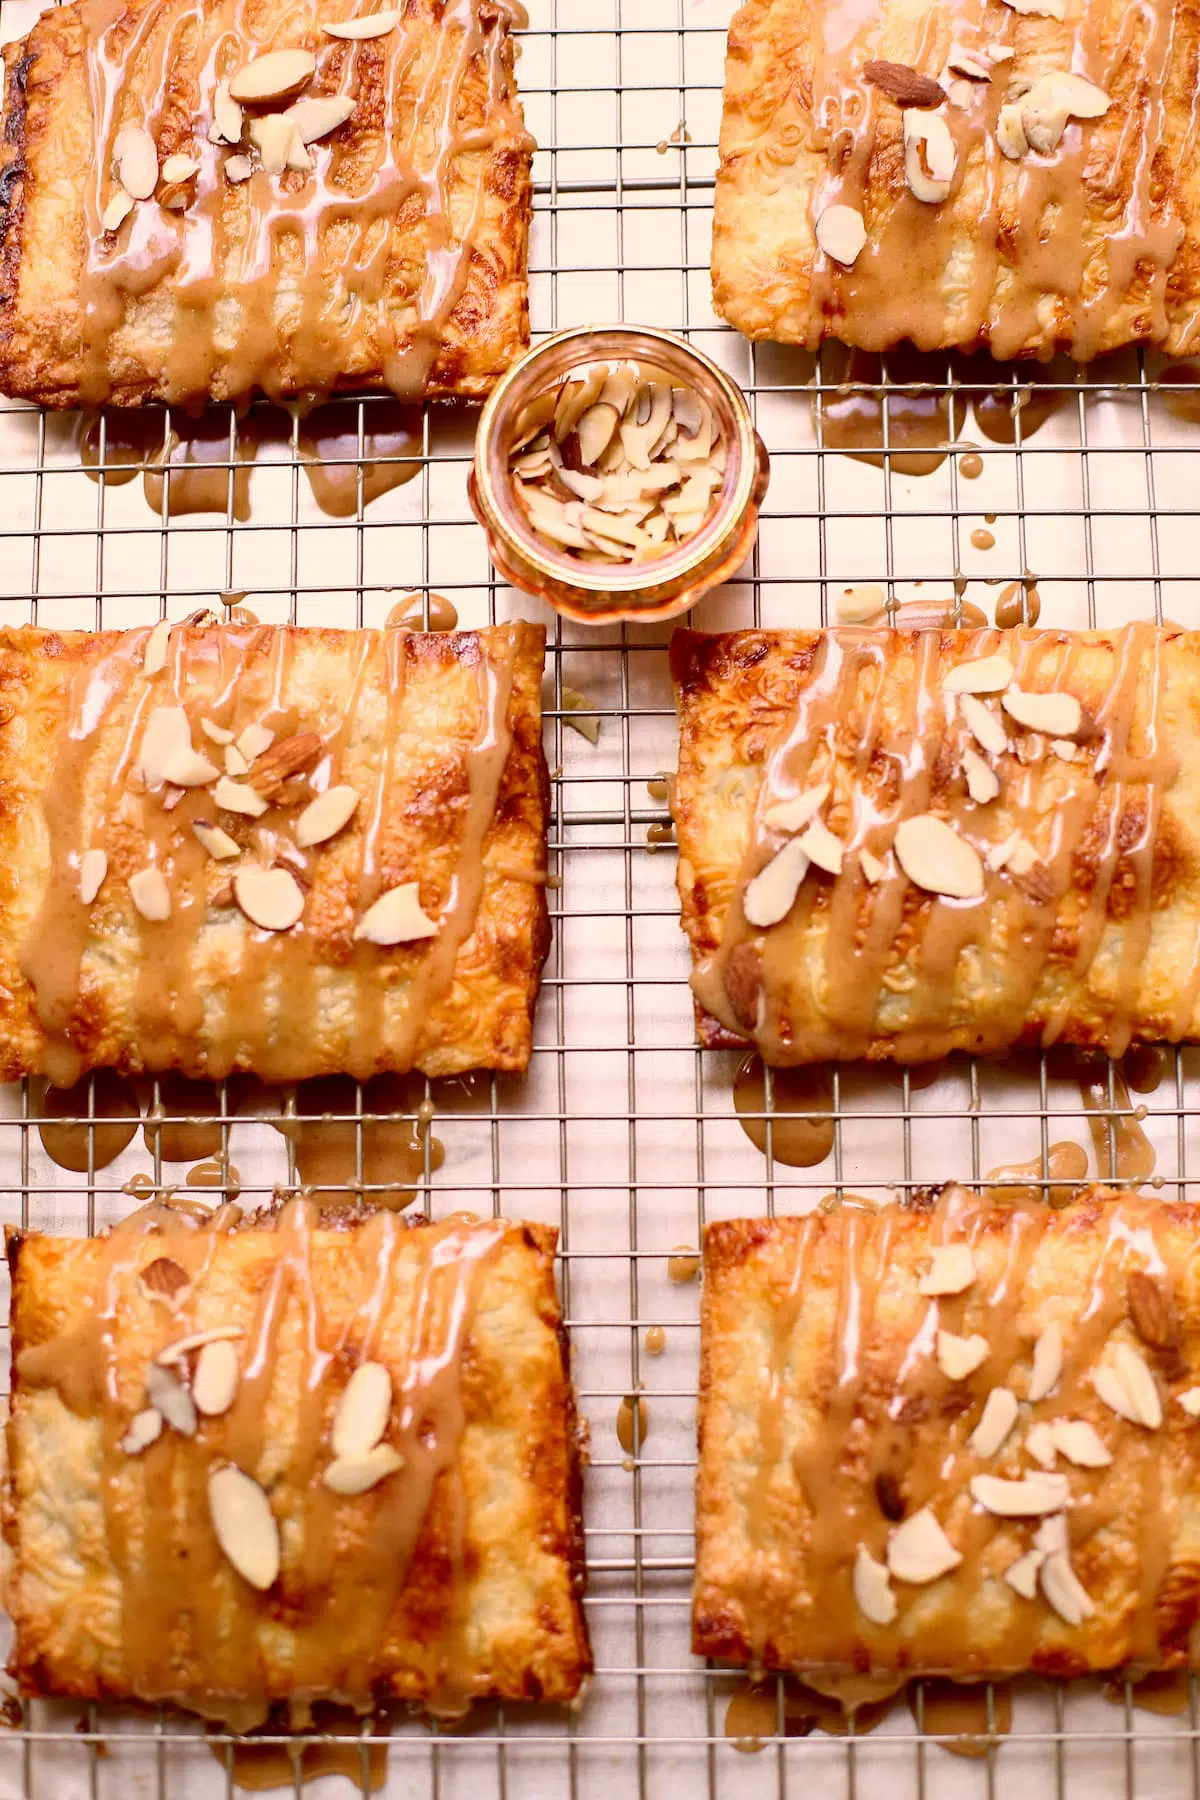
If you love nostalgic desserts, this recipe will bring it…these Apple Hand Pies with Pillsbury Pie Crust have the handy shortcut of refrigerated crust. Popular and delicious!
Jump to:
Why You’ll Love this Recipe
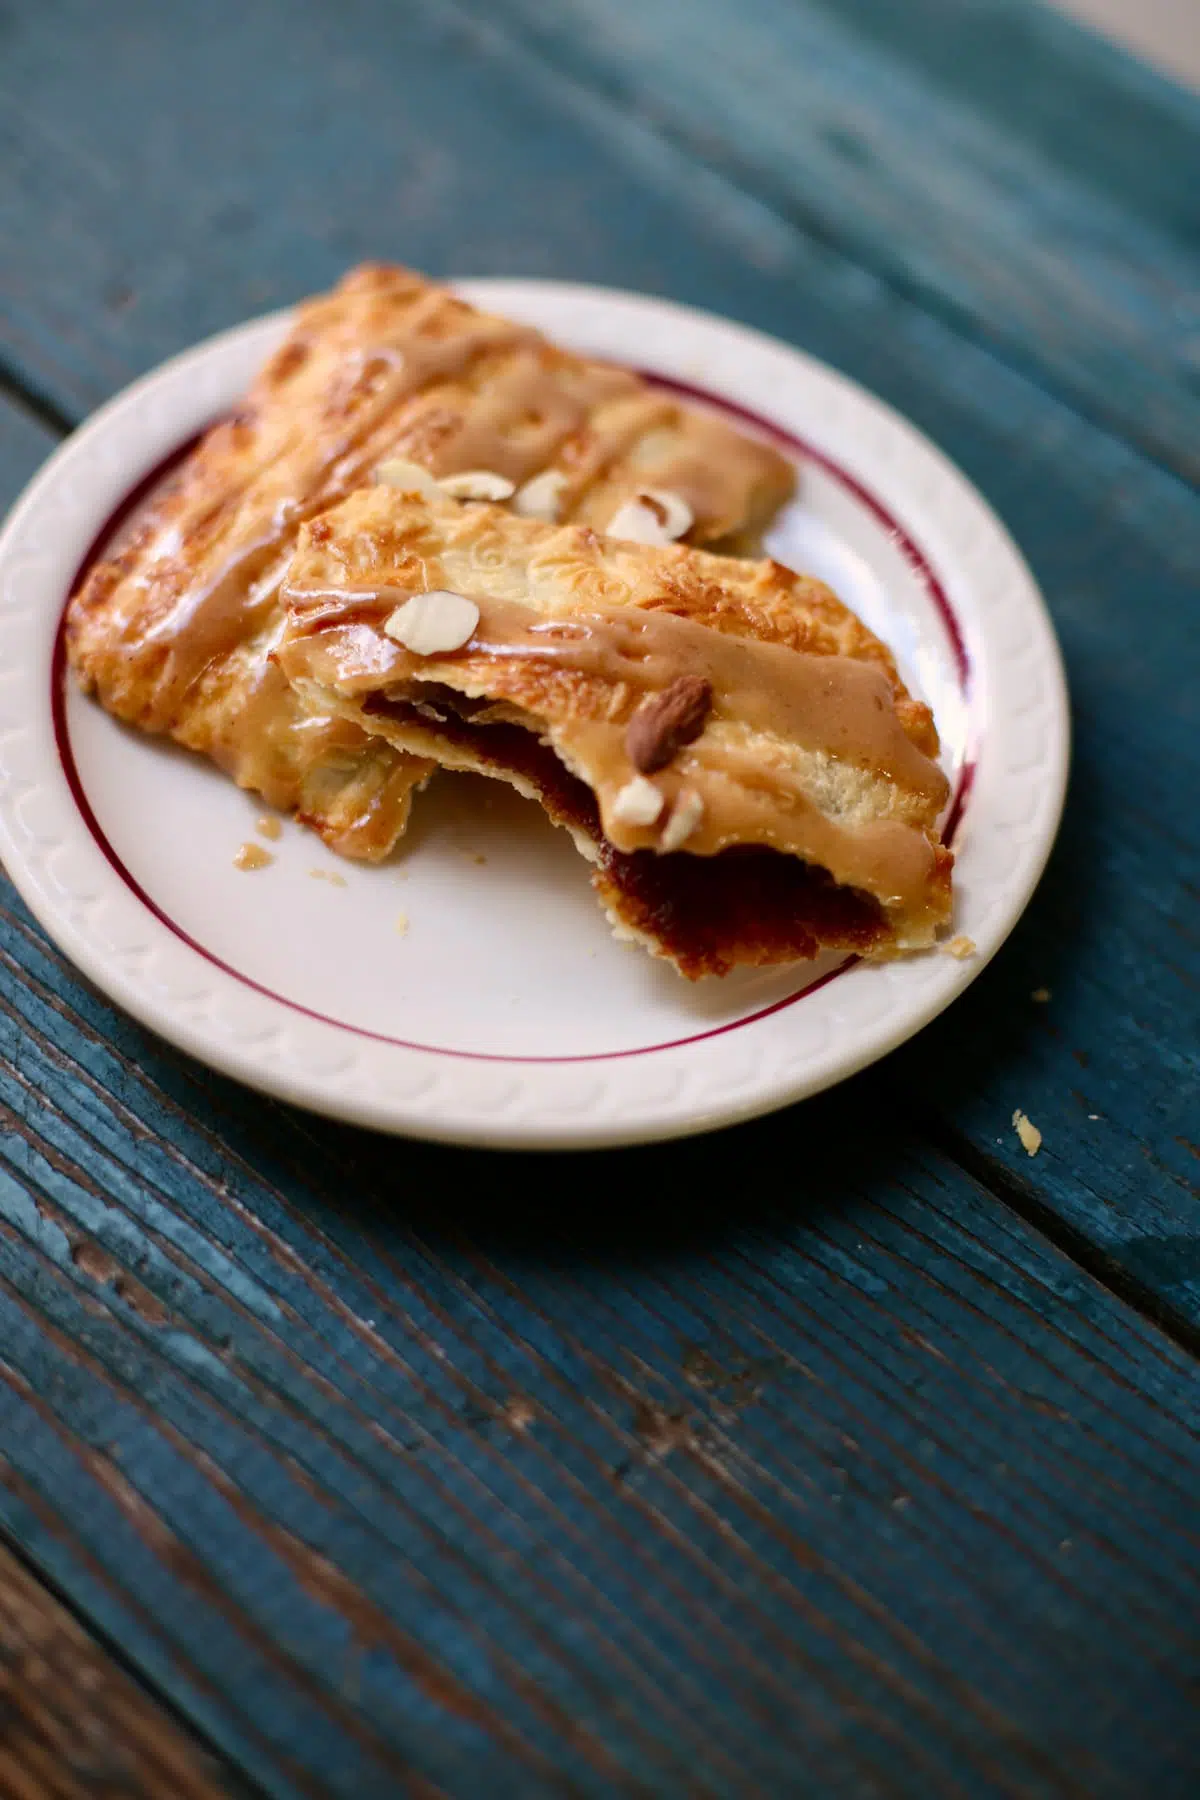
When I was a kid, the holy grail of breakfast was strawberry toaster pastries with frosting and sprinkles (two please, toasted) and Saturday morning cartoons. While I’d still eat these mini apple pies for breakfast, these definitely are a dessert, especially of you add a scoop of vanilla ice cream on top!
- This is one of those easy recipes that calls for store-bought flaky crust, and Pillsbury Pie Crust works great in this!
- This is a fun and nostalgic dessert for all ages, and it’s great for celebrations too!
- This apple hand pie recipe isn’t hard to make! Once you get the hang of crimping the crust edges together, you’re good to go.
If you’ve got a lot of apples on your hands, you might also like this classic Apple Cake that’s delicious and always gets raves. Take a look at these Waffles with Spiced Apples too…they are amazing with crispy bacon or sausage links for relaxing weekend mornings!
If you love apple recipes, you’ve got to try these Mini Caramel Apple Pies…and these comforting and cozy Baked Apples with Oatmeal Crumble….so delicious!
Ingredients You’ll Need
For the full recipe and instructions, please scroll down to the recipe card.
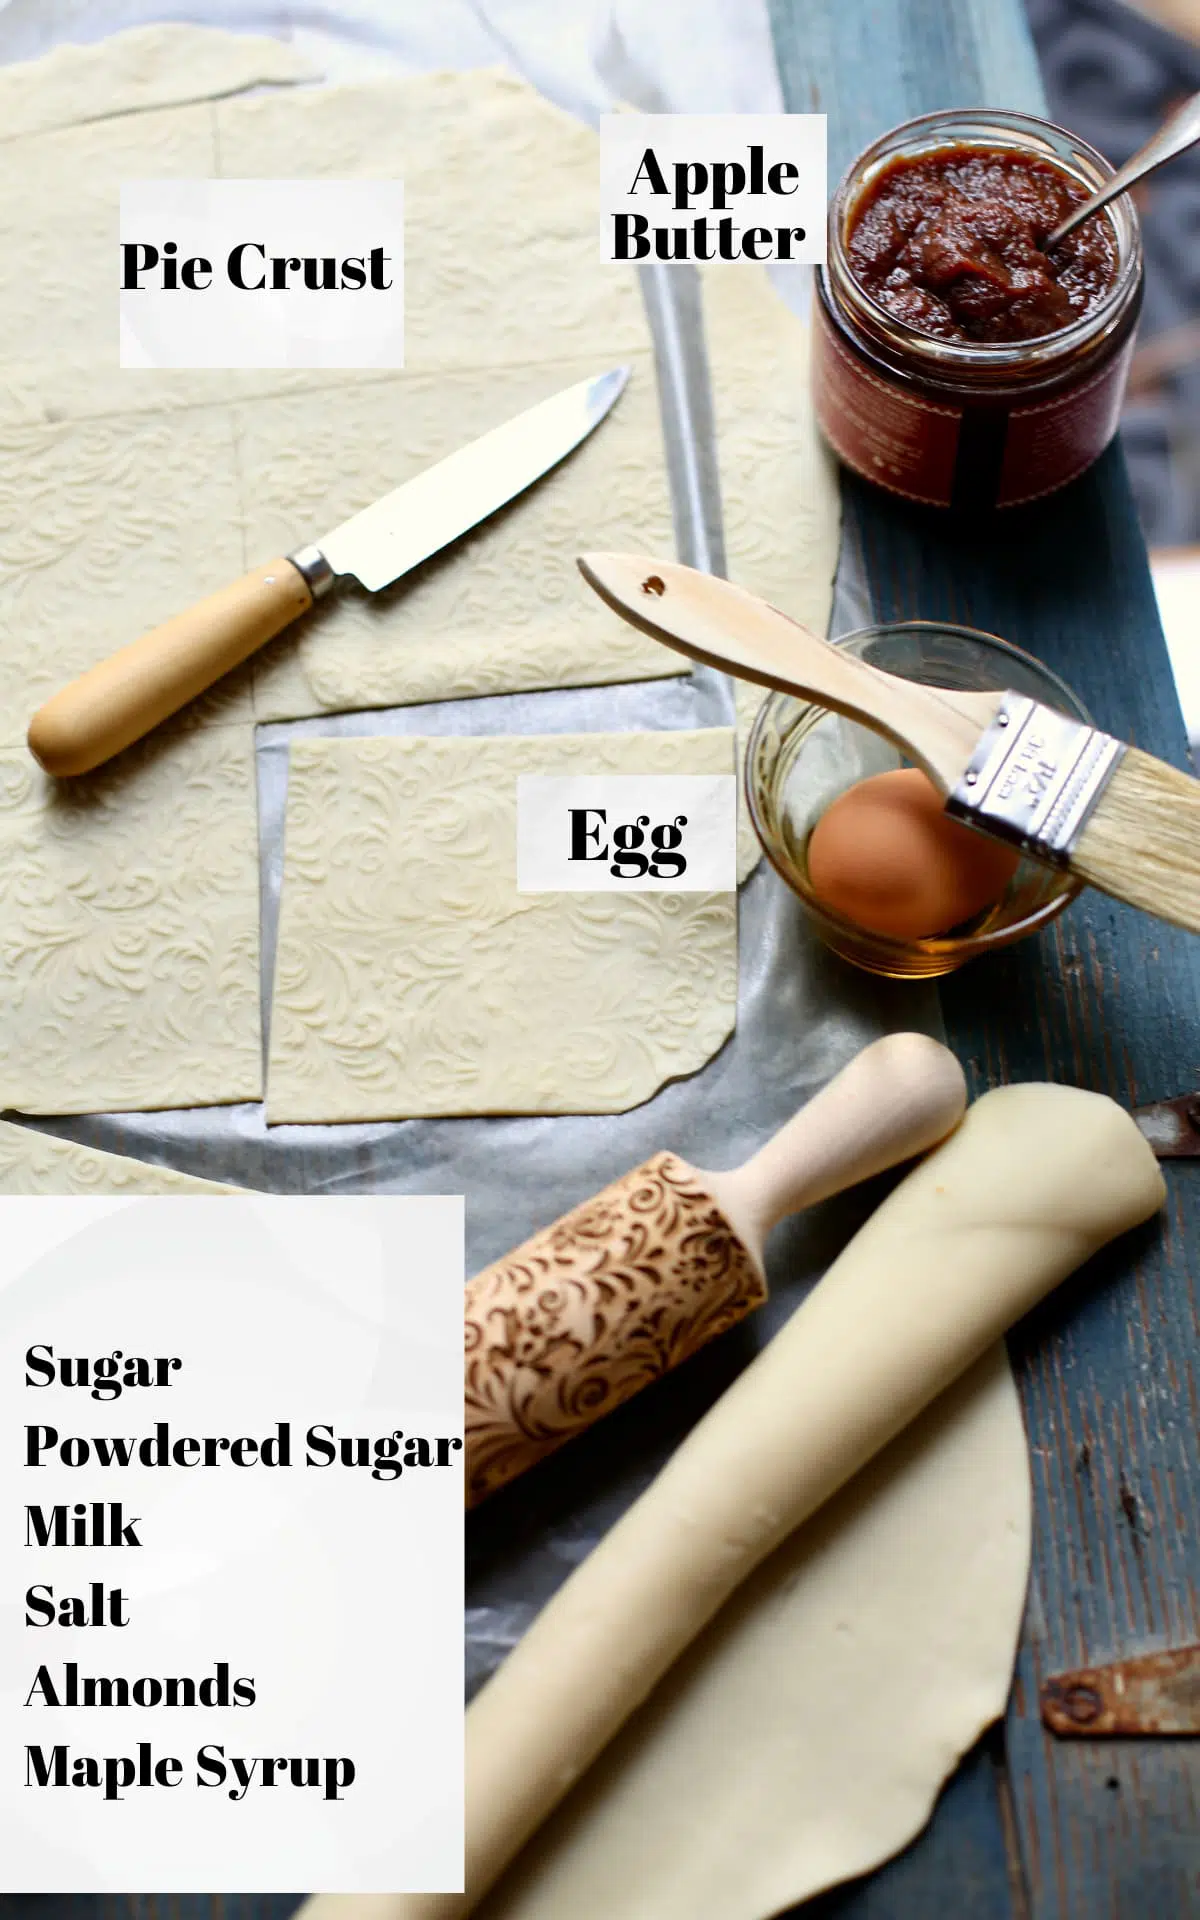
Here are main ingredients you’ll need for this recipe:
- Pie Crust: This is not sponsored, by I use Pillsbury Pie Crust all the time if I don’t want to make it from scratch. It’s great in this recipe, especially love that it’s rolled out so thin, and it’s easy to work with. I used a pretty patterned rolling pin that a friend bought me on Etsy.
- Apple Butter: Apple filling is a favorite, and tastes of fresh apples which is so good in these little pies, but you can also try other flavors like raspberry and blueberry jam.
- Egg: Whisk egg with water and salt in a small bowl, we’ll use this to make a glue to seal the top crusts to the bottom crust of each pie.
- Glaze: A glaze is really delicious on these, so just a little powdered sugar, milk, salt and maple syrup will do the trick.
- Almonds: Sliced and totally optional, but they look wonderful this way and have a little crunch too.
Step-by-Step Instructions
Here are the key steps to the recipe for this easy dessert, but please scroll below for full recipe and instructions
- Bring the pie crust to room temperature before rolling it out, about 30 minutes
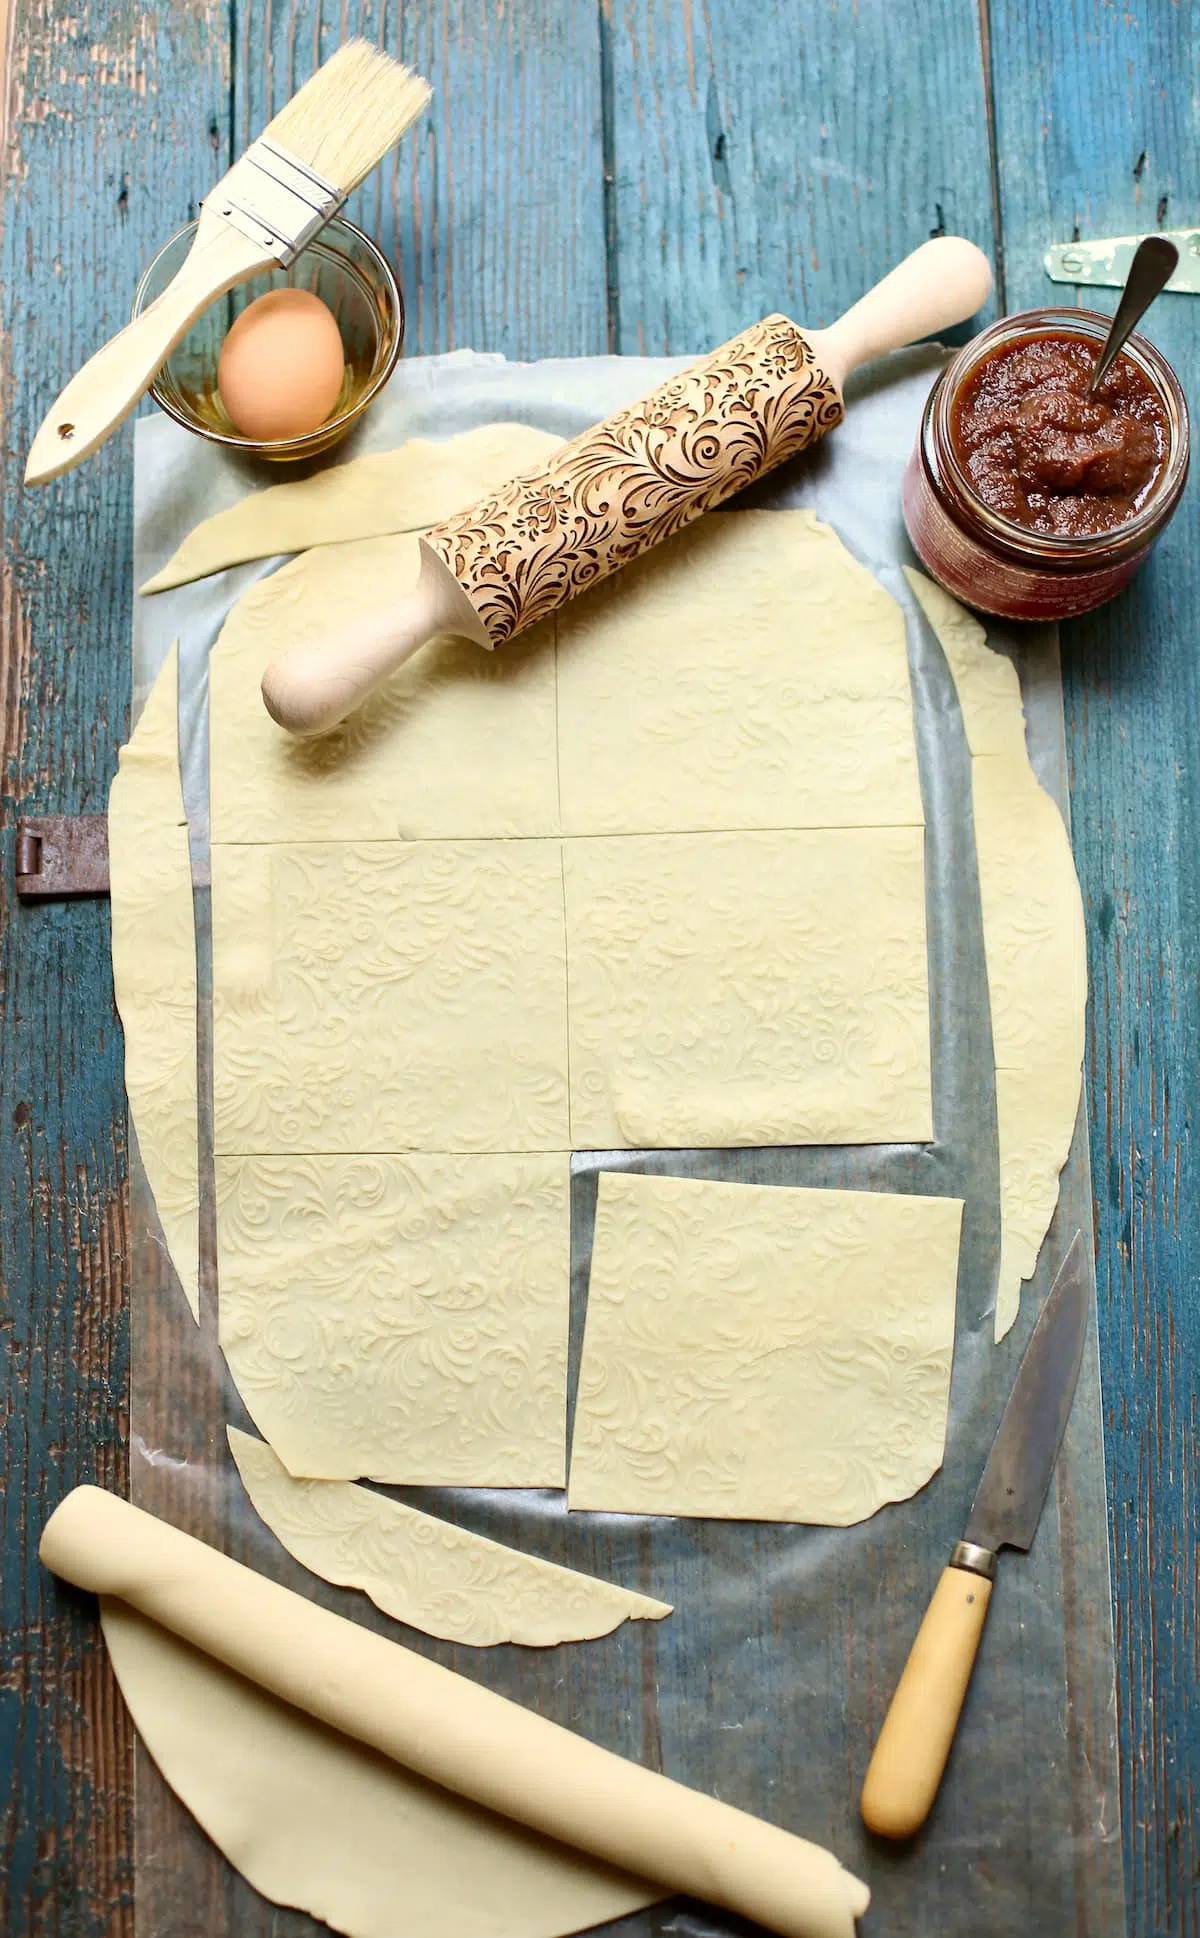
- On a flat work surface, roll out a rectangular shape with the dough using a rolling pin…don’t worry, it doesn’t have to be perfect!
- Trim the outside edges of the dough as shown above to make six 4″ portions.
- Do the same with the other roll of dough. You’ll need 12 four-inch pieces of dough total, one for the top, one for the bottom.
Assembling the Pies
To assemble the hand pies, here’s what you do:
- Place six of the pie dough squares on a parchment paper-lined baking sheet (smear a little olive oil or baking spray down first to make sure the pies don’t stick)
- Spoon a tablespoon of apple butter on each square and spread it around a bit, making sure to leave 1/4 ” edge clear for sealing.
- Make a quick egg wash, and using a pastry brush or your fingers, smear it on the four edges of the dough.
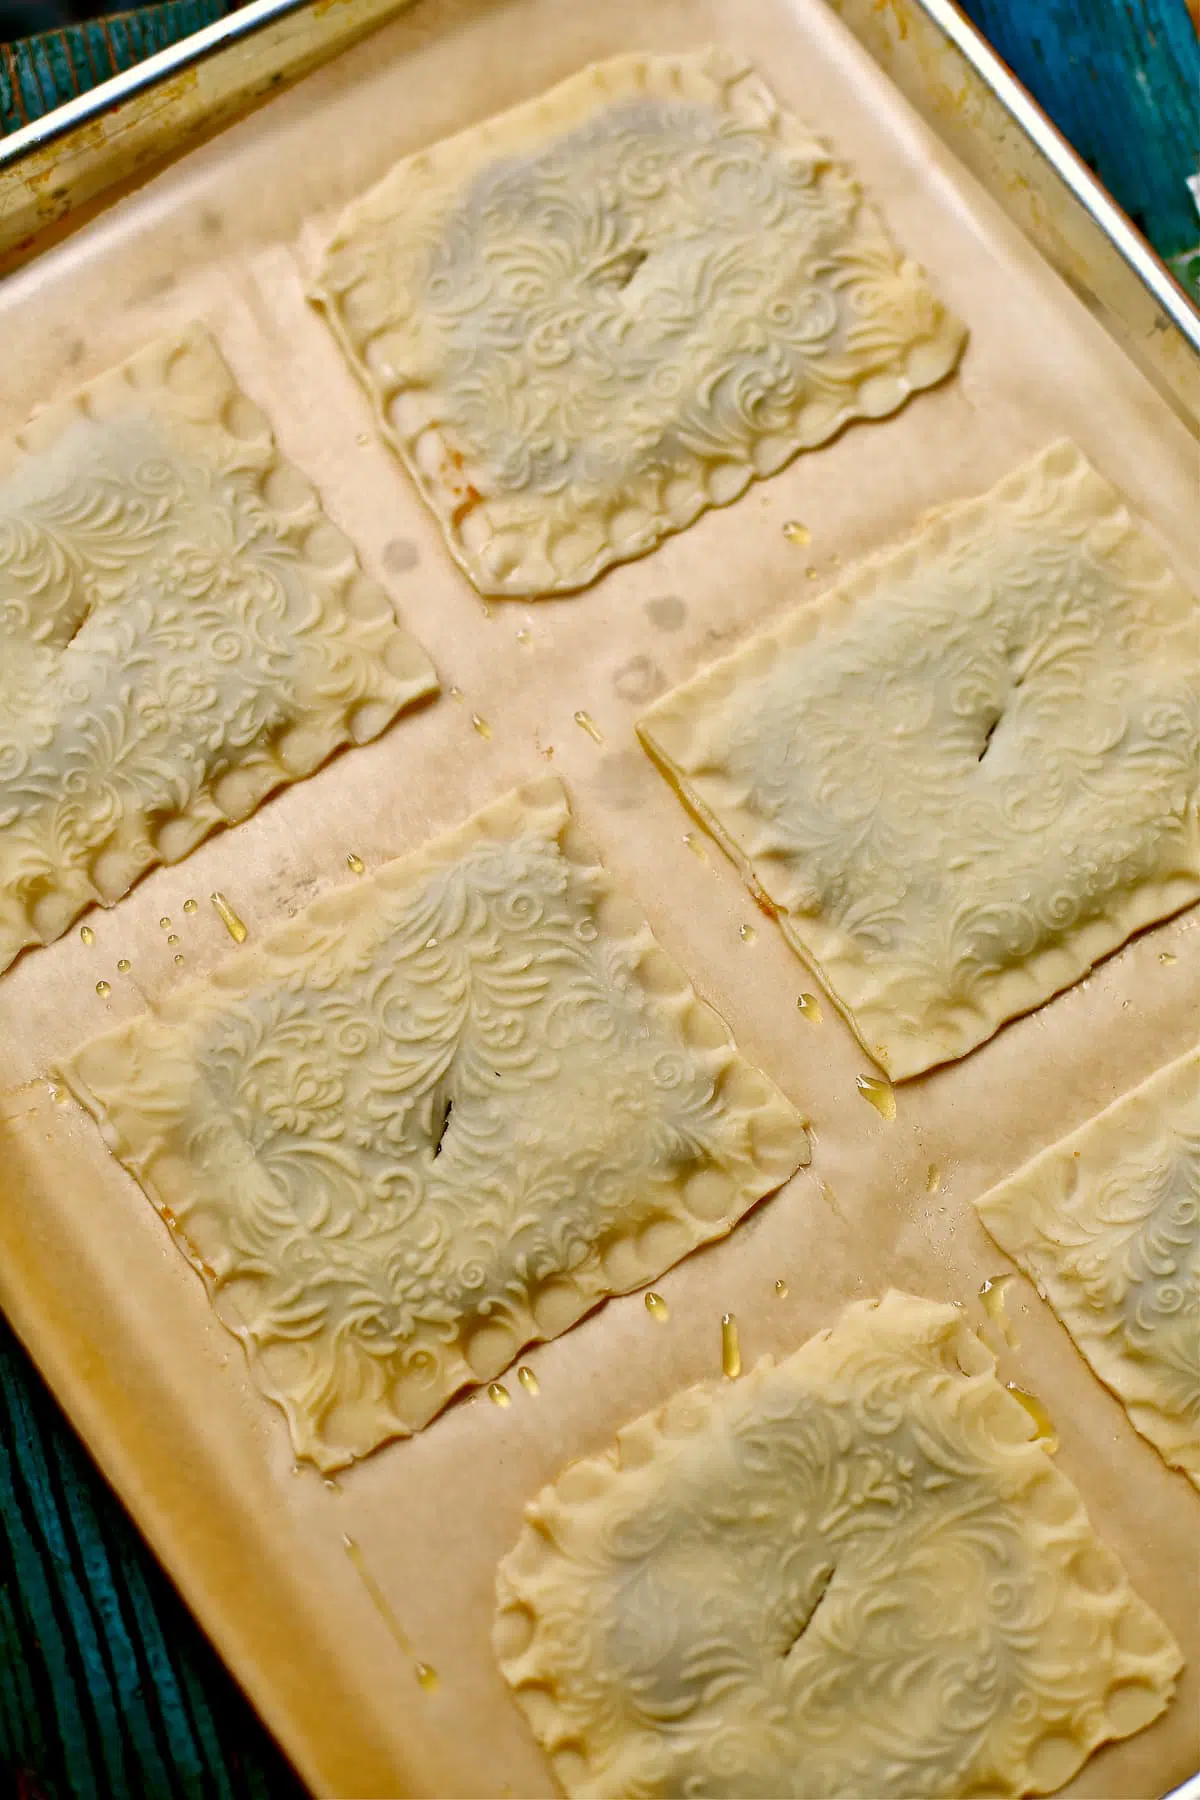
- Top with another 4″ dough piece, then press the edges with your fingers to close each pie.
- Add more egg wash to the tops of each pie, then sprinkle with a little sugar.
- Cut slits on the top crust with a sharp knife – just a 1/4 inch or so, in the middle of each pie to let the steam escape when baking.
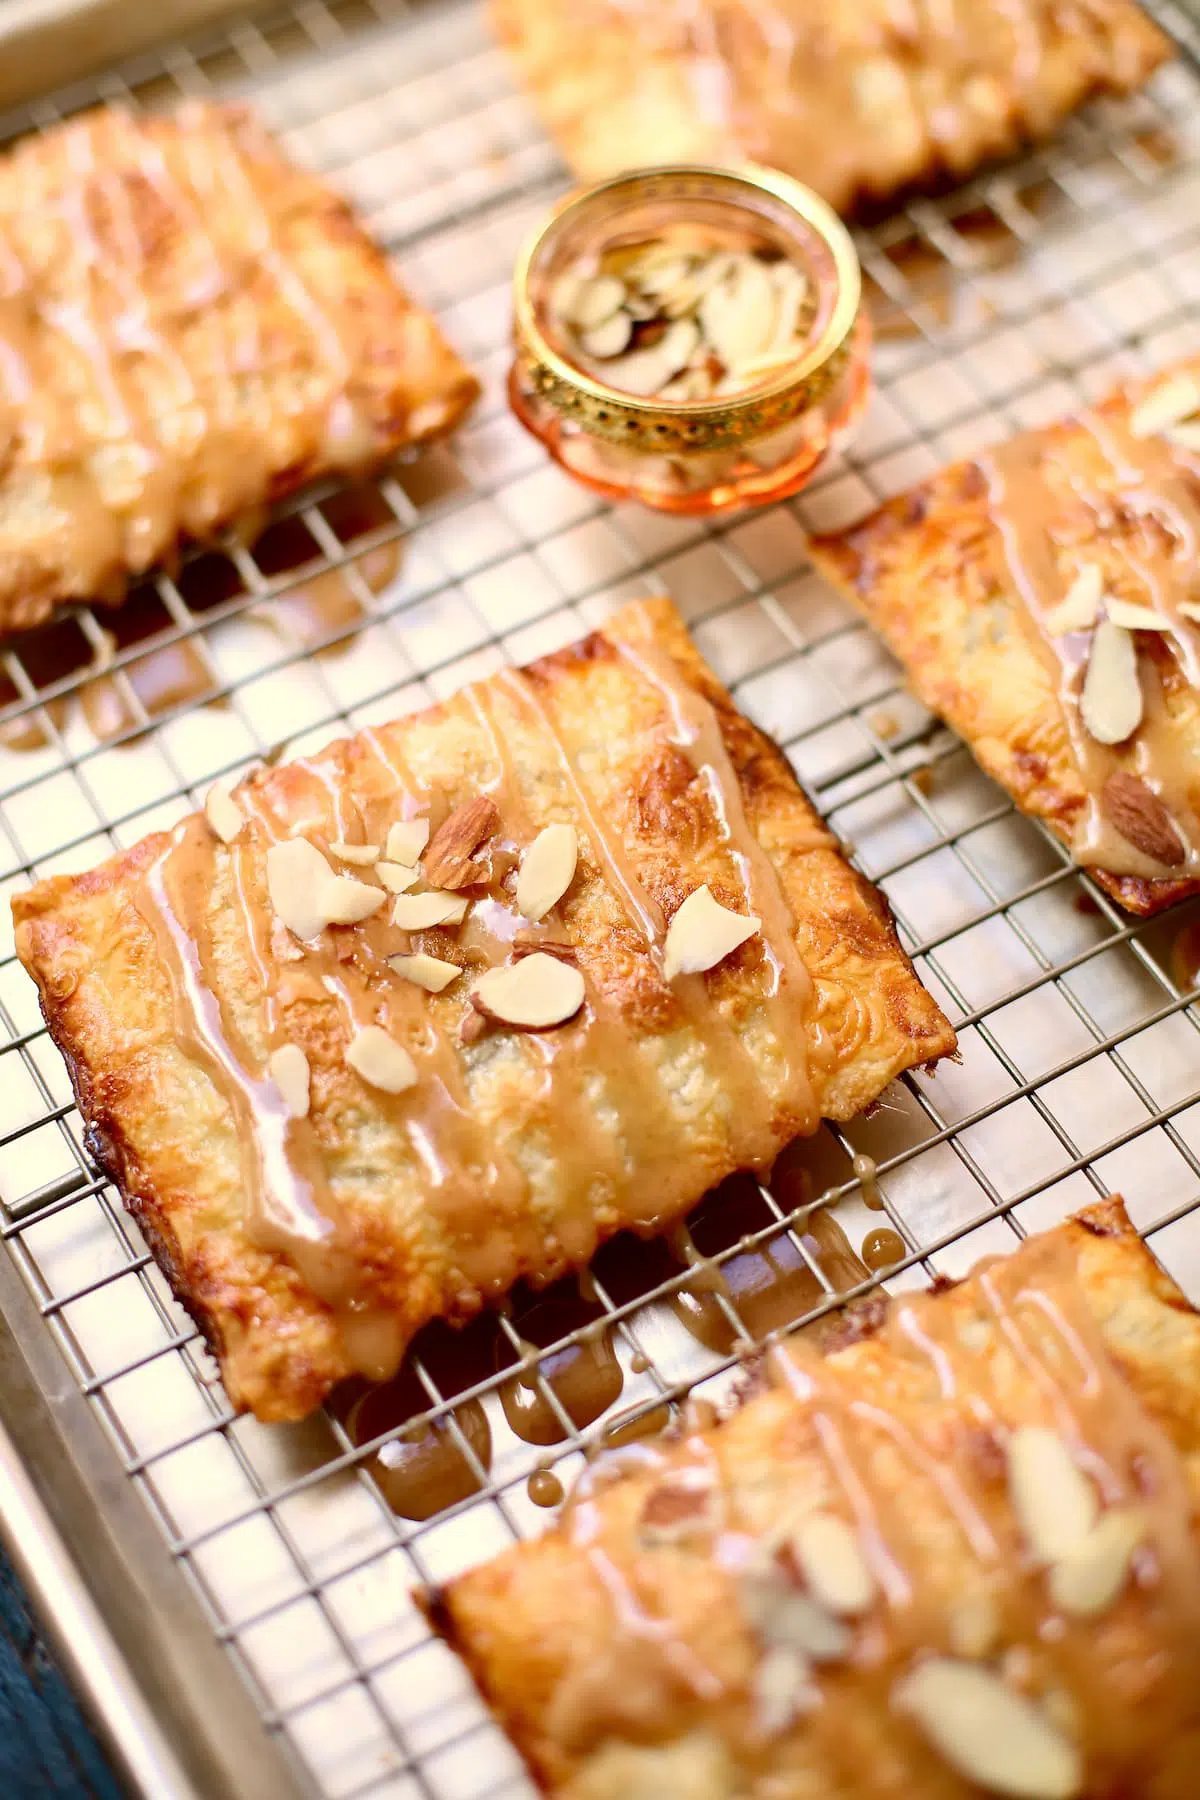
- When completely cool, glaze the pies and serve!
Expert Tips

- Very important tip: Don’t overfill the pies with apple butter! A slightly rounded tablespoon is all you need. Too much and the filling with seep out with baking.
- Keep the pies from sticking to the baking sheet by rubbing a little olive oil on the parchment paper before you begin. Just a teaspoon or two, and smooth it all around the parchment paper. You could also use non-stick baking spray instead.
- Be sure to chill the pies before baking – don’t skip this step! This helps the dough stay in place and prevents spreading or leaking when baking.
- Unbaked pies can be carefully wrapped and frozen for up to a month, then baked straight from the freezer until golden brown.
- Let the pies cool completely before adding the maple glaze. If the pies are too warm, the glaze will slide right off.
Serving Ideas
- Three words: Vanilla Ice Cream.
- This is a great recipe for fall or winter parties. These make great party giveaways in little cellophane bags with a ribbon.
- Dress them up! Slide the individual apple pies into small cellophane bags from the craft supply store and tie with a pretty ribbon, then set in a flat-bottomed basket for picnics, tailgating, birthdays, or as a delicious party favor!
- These apple pie bites are a fun dessert after a Naan BLT or a Shredded Chicken Burrito Bowl, or a nice dinner like this traditional Yankee Pot Roast made in the slow cooker.
Frequently Asked Questions
You can, and they freeze beautifully! Just wrap each pie very carefully in plastic wrap or wax paper, then foil or slip into a sturdy freezer-safe plastic bag or container. The pies can be baked when frozen or partially frozen, and it will take a few minutes longer until golden brown.
Yes, just use smooth jam for best results. If the jam is too chunky, the pies won’t seal properly. You can also whiz the jam in the food processor or blender to make it smooth in a pinch.
Freezing the dough for 30 minutes before baking in a hot oven (375 degrees) will ensure the pies don’t get soggy!
Sure! Try making blueberry hand pies or raspberry. Just make sure your filling doesn’t have big chunks of fruit, and that you keep the filling a quarter inch from the edge so it doesn’t seep out!
More Recipes to Try
- Roasted Nectarines with Caramel Sauce: So delicious and pretty, what a great dessert!
- Lemon Shortbread Cookies: Soft and crumbly, these shortbread slices are amazing!
- Peanut Butter and Jam Cookies: The best of both worlds, these are absolute favorites!
- Apple Hand Pies web story is here.
- Blueberry Mini Pies: Another Pillsbury Pie Crust recipe.
- Jam Pies: Tiny hand pies with Pillsbury pie crust.
If you’ve tried Apple Hand Pies with Pillsbury Crust, or any recipe on Studio Delicious, please leave a 5 star rating and tell me about it in the comments below, I’d love to hear about it!
Looking for more tips and fresh, homemade recipes? Join my email list, tag and follow me on Instagram using #studiodeliciouseats, follow my boards on Pinterest, and see what I’m up to on Facebook and Twitter!

Apple Hand Pies with Pillsbury Pie Crust
Ingredients
- 1 box Pillsbury Pie Crust, 2 rolls, 14 ounces per box
- 1 teaspoon olive oil or baking spray
- ½ cup Apple Butter
- 1 large Egg
- 1 teaspoon Water
- ¼ teaspoon Salt
- 2 tablespoons Sugar
- 1 cup Powdered Sugar
- 2 tablespoons Pure Maple Syrup
- ¼ teaspoon Salt
- 1 tablespoon Milk
- 1 ½ tablespoons Apple Butter
- 2 tablespoons Sliced Almonds
Instructions
- Prepare a large baking (cookie) sheet by lining it with parchment paper. Working with one roll of dough at a time on a lightly floured work surface, and working with one at a time, roll each pie crust out to make a rectangular shape, it doesn't need to be perfect. Trim the outside area of the rectangle to make the edges straight, then cut into six squares, approximately 4 inches each. Do the same for the second roll of dough.
- Smear the olive oil (or use baking spray) on the parchment lined baking sheet, then put six pie of the dough squares down, placing them several inches apart.
- Spoon one tablespoon plus one teaspoon of the apple butter in the center of each square, smoothing it out with the back of a spoon, but leaving a quarter inch space around the edges of each pie. In a small bowl, whisk together the egg, salt and water, then brush the outside edges of the dough with the egg mixture (which will act as a glue for the top piece of dough) then top with another dough square and press the edges together with your fingers or the back of a spoon or fork lightly to seal the two pieces of dough together to make six pies. Refrigerate for 30 (thirty) minutes before baking.
- Preheat the oven to 375F degrees. After removing from the refrigerator, brush the tops of each pie with a little bit of the egg wash, then make a small cut in the middle of the pie so steam can escape. Using the two tablespoons of sugar, sprinkle a teaspoon of sugar on the top of each pie, then bake for 20-25 (twenty to twenty five) minutes or until golden brown. Cool on a wire rack.
- Make the glaze by combining the powdered sugar, maple syrup, salt, milk and apple butter in a small bowl. When the pies are completely cooled, drizzle the glaze over the top and sprinkle with a few sliced almonds for serving.
Notes
- Very important tip: Don’t overfill the pies with apple butter! A slightly rounded tablespoon is all you need. Too much and the filling with seep out with baking.
- Keep the pies from sticking to the baking sheet by rubbing a little olive oil on the parchment paper before you begin. Just a teaspoon or two, and smooth it all around the parchment paper. You could also use non-stick baking spray instead.
- Be sure to chill the pies before baking – don’t skip this step! This helps the dough stay in place and prevents spreading or leaking when baking.
- Unbaked pies can be carefully wrapped and frozen for up to a month, then baked straight from the freezer until golden brown.
- Let the pies cool completely before adding the maple glaze. If the pies are too warm, the glaze will slide right off.
Nutrition
- Super important to read the whole recipe before you begin
- Pay attention to the ingredient list and photos for the recipe
- If possible, prep your ingredients a little before you start
- Always use a sharp knife for safety
- Use the size of pan called for in the recipe
- For savory recipes, taste and season as you go
- Buy fresh, organic ingredients, locally sourced whenever possible

Please rate this recipe and thanks for leaving a comment!